This self-made soft toy will be a wonderful gift for dear and close people. After all, a person will be pleased to understand that when you made a toy, you thought about him. Below you will see various patterns and patterns of toys. Let's start, perhaps, with such a cute tiger:
You can sew such a wonderful angel bear,

which pattern is attached:

An assembly diagram is also attached:

Or, for example, you can sew a Smesharik Krosh. Its pattern is quite simple and suitable even for beginners.

And here is the cute Woof kitten, which is also easy to sew.


Consider some cool toys that you can sew yourself.
Hedgehog


Frog


Owl


Every child loves large soft toys, and even girls are delighted with such gifts. Usually a teddy bear is a favorite stuffed animal, but what if you sew a polar polar bear? Moreover, there is a pattern.
Patterns in the following photos:


The following bear was sewn according to the same pattern:
DIY soft toys using the tilda technique
Sewing tilde toys is very simple. Try it yourself - and you will be convinced of it.
Bunny


These are pretty simple toys to sew.
Deer


Doll


You can sew these toys from fabric, the patterns of which are not needed. Only one pattern is needed, according to which they are sewn. Since their bodies are the same, only the ears and tails change.


You can even sew soft toys from socks.
DIY soft toy "Bunny"
To understand how to sew soft toys with your own hands, patterns of which are not needed, watch the master class.
Let's make a bunny out of socks.

What is necessary
- Couple of socks;
- Sintepon;
- A piece of velvet (for the nose);
- Button or bead;
- Pieces of fur.

Turn the sock inside out, place with the heel up and cut off the elastic (2.5 cm). Cut the sock in half, starting from the toes, not cutting to the heel of 2.5 cm.

Turn the second sock inside out and place with the heel up. Cut off the elastic band - 6 cm. Cut off the fingers. Cut lengthwise, not cutting to the heel 4 cm. Round the corners of the ears. Cut the piece with elastic in half (future 2 front legs). Cut out a piece for the tail from the fingers.
Pull the tail piece over the edge with a thread, fill with padding polyester and secure. Similarly, you can make a nose out of black fabric. Sew the ears with a seam "over the edge into a loop". Turn the head to the front side and fill it with padding polyester. Pull off the hole and sew in a circle.

Similar to stitching the torso.

Sew with a seam "over the edge into a loop" of the feet and turn them out.
On the head, pull the heel vertically with a thread, then wrap one part of the heel, tighten. This will be 1 cheek. Make the second one. Pull the bridge of the nose with a through stitch.

Make fingers on the legs with thread ties. Bend the bottom of the legs and sew blind stitches to form the feet.

Sew on the tail with blind stitches.

Fill the front legs with padding polyester, pull off the hole in a circle and sew. Make the fingers in the same way as on the legs.
Many consider childhood to be the happiest part of their life. And toys are a symbol of this carefree period. Perhaps that is why many adults are so happy to sew funny animals from felt, fleece and even chintz. But in order for the product to turn out neat, you must first learn how to build simple patterns of toys from fabric with your own hands.
Dolls with soul
Rag toys perform several tasks at once. First of all, their texture is useful for development fine motor skills at the toddler. And besides, they:
- safe (there are no sharp and too small parts in crafts);
- durable (they have no elements that will break);
- interesting (there are many options for playing with a felt toy).
Choice of fabric
The most important stage of work is the choice of material for sewing. Warm, soft, with a short nap, felt as if it was created for cute and original animals. In work, this fabric is not capricious, since:
- practically does not pour;
- does not twist or slide;
- keeps its shape - in general, exactly what beginners need.
In addition to felt, textile toys - tildes are very popular. They appeared relatively recently, in the 90s, but have already won the hearts of millions. Flax, coarse calico, cotton, etc. are used for their manufacture. As for the patterns, the basic principle of their construction is simplicity. Let's see this in practice!
6 basic patterns
A paper template helps to make things "as in the picture." Simple patterns of toys are suitable for beginners, although they look so unique that more experienced needlewomen may also like them.
Baby in a pink dress

Materials:
- a sheet of paper (tracing paper or wallpaper);
- scissors;
- tailor's chalk;
- pencil;
- eraser.
Instructions:
- We draw an oval of the head, make marks for the eyes (they are closed at the pupa), cheeks and mouth.
- We draw a hairstyle. It consists of two parts - bangs with a parting in the front and loose curls in the back.
- We make markings for the dress in the form of a trapezoid.
- We proceed to the body. We draw apart arms and legs.
- The final stage of building a pattern is a semicircle-shaped shoe with a fastener bar.
- Cut out the details.
- Transfer the outlines to the felt, cut out and sew with an overlock seam.
Please note that all the details of both simple and complex patterns of felt toys are cut with your own hands without allowances.
Funny puppy
All details of this model have clear outlines without florid lines.

Materials:
- pattern paper;
- pencil;
- compass;
- scissors;
- tailor's chalk;
- felt 3 colors;
- filler.
Instructions:
- We draw a body with three protrusions-legs.
- With the help of a compass, mark two almost identical circles intersecting in the center. Wipe away the extra lines - a figure resembling an eight should remain.
- We draw elongated ears, circles of spots (3 circles of different sizes), an oval of the nose and a hook of the tail.
- We cut out the details, pin them on the fabric and outline them with chalk.
- We sew all the elements with a whipstitch, adding a little filler.
Elegant cat
A distinctive feature of the patterns of tilde toys is that only the outlines of the figure are drawn on paper, without precise detailing.

Materials:
- a4 sheet;
- simple pencil;
- chalk for drawing on fabric or a bar of soap;
- scissors;
- filler;
- beads for eyes;
- the cloth.
Instructions:
- Draw the outline of a sitting cat on paper.
- Separately draw 2 front legs - elongated ovals with three fingers on one narrow side.
- We make a tail - a volumetric hook.
- Cut out the details.
- We transfer the elements of the cat's figure to the fabric, make an allowance of 1-1.5 cm.
- Cut out, sweep on the seamy side.
- We turn it out, fill it and sew it up with a blind seam.
Cute hare

Materials:
- paper;
- pencil;
- scissors;
- the cloth;
- filler;
- 2 beads.
Instructions:
- In one detail we show the whole figure of a hare with ears, front paws.
- Separately draw the pattern of the hind leg, which looks like a bell with 3 petals.
- Cut out the elements.
- We transfer the details to the fabric folded in half. Do not forget about allowances (1.5-2 cm).
- Cut off the hands and head from the paper pattern - we get a suit pattern.
- Draw 2 such details on the fabric.
- We sew, fill, and then, having previously stitched along the side seams, put on a dress.
Kind turtle
Kind slow Tortilla will become not only your child's favorite friend, but also perfectly cope with the function of a soft pillow.

Materials:
- a piece of wallpaper or tracing paper;
- pencil;
- compass;
- scissors;
- fabric in two colors;
- filler.
Instructions:

Cheerful teddy bear
Bears are the favorite toys of more than one generation of children. Every adult in early age I definitely had my own bear. Do not leave the traditions - make "his" bear cub for the little one.


Materials:
- paper;
- pencil;
- scissors;
- the cloth;
- filler.
Instructions:
- On paper, we draw the outlines of the bear: the body, head, ears, front and hind legs.
- Separately, draw 2 circles of different diameters: a large one for the muzzle, a smaller one for the nose.
- Cut out the details.
- We transfer them to the fabric, sew them, fill them, detail the mouth and eyes with stitches.
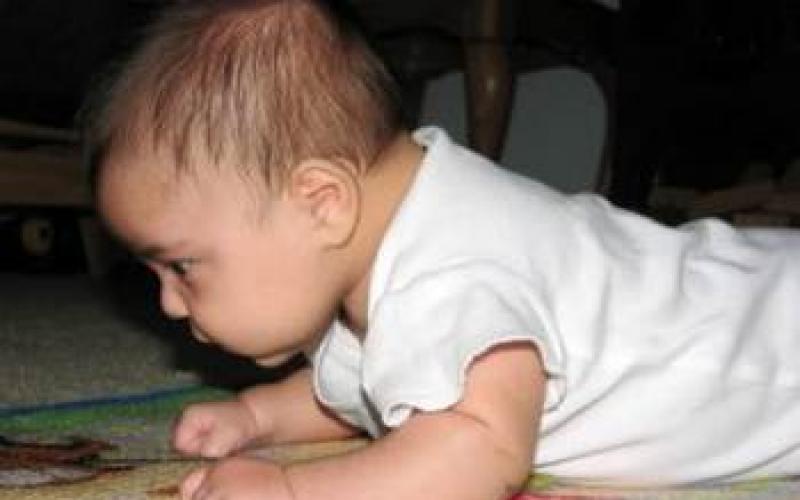
Good mood to you, dear readers, friends and guests of the Domovyonok-Art blog! Today we will continue to create for children (and maybe not only for children). And let's talk about how to sew a Teddy bear. This one, whom you see now in the photo 👇
Honestly, for a long time I thought whether to post this master class at all, because when you see on the net what kind of bears do experienced craftswomen, you immediately think, well, what can I teach. However, I decided to publish this article no longer in order to show how to sew a bear correctly, but in order to tell about my experience and, possibly, inspire someone and remove the veil of fear of a new one. Indeed, it often happens that we look at some ideas on the Internet, we would like to, but do not dare, because this is an unknown occupation, there is no experience, and it is generally not known what will turn out in the end.
Background
A long time ago, on the Internet, I began to come across pictures with these bears: such gray, shaggy cuties, a little awkward, but at the same time some special. You look at them, and you just want to touch, touch😍. However, I do not remember that such bears were found anywhere in our free market. And, in fact, what am I. I wouldn't buy it anyway, knowing that it is quite possible to sew a Teddy bear with your own hands.
But, as it happens, I looked at the picture on the Internet, closed the browser and forgot. And after some time, a child asked me to sew a bear 🐻 (well, you know, when a mother is a needlewoman, children are sure that she can do anything. I even wrote an article on this topic once). I promised that someday ... In general, for some reason it didn't work out right away, and there were no suitable materials.
And so, in my next visit to a handicraft store, I accidentally stumble upon a piece of gray shaggy fabric, although I came for completely different goods. What can I say, I promised! 😀 Therefore, having bought this and just in case white fur, it was decided to start sewing a bear, of course, Teddy. Although in the end it turned out not very Teddy, but that makes it no less cute.
Today I will not teach the tricks of sewing toys, but just show how it was
How to sew a Teddy bear with your own hands
The first thing you need to sew a Teddy bear is, of course, materials:
- fur - 50x50 cm;
- matching fleece - a small piece;
- threads to match the fur;
- filler for toys;
- scissors;
- pencil, or better a disappearing marker;
- eyes, nose;
- universal glue.
Pattern
In order to sew a Teddy bear, we need a pattern. Since I don't have much experience in sewing soft toys, and even more so, I took the pattern on the Internet (click to enlarge):

Using this pattern, I drew all the details on the back of the fur (in fact, this is some kind of very hairy jersey). And also on a piece of fleece (I didn't have a fleece, I had to use soft felt) we draw out parts of the face, traces on the legs, ears.

➡ To ensure that there are no further distortions when sewing, I additionally put control marks on the pattern and applied them to each detail. Further, when sewing along these points, you can adjust the tension of the fabric, its offset, etc.
We cut out the details with a margin of 5-7 mm.

Teddy bear ears
And now we start stitching. Well, since I hadn’t sewed Teddy bears before, so I decided to start with the simplest thing - from the ears. In one ear we have 2 semicircular parts and plus a gray felt insert. Sew this insert onto one of the parts with a overcast seam.

Now we put the details with their front side to each other and sew them with the "Back needle" seam, leaving the bottom unsewn. We do the same with the other ear.

It remains to turn out the details. I did this with a wooden skewer and a pencil. The ears of the Teddy bear are ready.
Teddy bear paws
What else can be done so simple? Paws! For the front legs, we sew in pairs the corresponding parts, placing them first facing each other. Then we turn it out.

The hind legs are a little more complex. The pattern shows a foot that I did not cut out of fur, but out of felt. Accordingly, the additional insert (dotted line in the diagram) was no longer done.
So, for sewing the hind legs of the Teddy bear, we first sew the necessary parts on both sides (Legs). We leave them unstitched from below and from above. 
Now take the foot and place it facing inward towards the fur. We connect these parts with a seam "Back to the needle". We carry out a similar operation with the second leg. And then we turn it out.

➡ If you still want to stuff the teddy bear with sawdust, then such fur as in the photo will not work. It has a knitted base, so when stuffed tightly, the fabric will stretch a lot, and fine wood dust will pass through it. It is better to use something denser like plush.
Now you can sew the holes with a blind seam. We sewed the paws of the Teddy bear.
DIY teddy bear head
We take the two front parts of the head, fold them facing each other and sew only on the side where there is this depression. Moreover, the recess itself is not stitched. That is, in fact, we make two lines: top and bottom. We do not touch the even part yet.

And into this recess we will sew the face of a Teddy bear. It had to be made of felt, which was not very convenient for this part.
Only here I misunderstood the pattern and instead of making a seam from the center (where the bend is) to a point and, I gathered along the contour and then tried to carefully sew it into the face. Therefore, the folds are not very necessary here. Don't do this 😆

So, when the hairless part of the muzzle is prepared, we sew it into the front of the head.


Now we need to sew the head of our Teddy bear. We put the prepared parts face to face to each other. We start from the bottom, from the point r, we reach the dotted line and in this place we insert the eyelet inside so that the insert in the turned out state looks forward.

We turn the head to the front side and fill it with filler.

The head of a Teddy bear with your own hands is ready. There is one more rather large detail that we will deal with.
We sew the body of a Teddy bear
The body of the Teddy bear will also be sewn from 4 parts. First, we take two parts of the belly, again put them facing each other, join the “Back needle” seam only along the convex half. You can leave a little unsewn below, so that there is where to put the filler later.

Now the back of the bear. We also sew only the convex side. Just keep in mind that this pattern also provides a tail, which must be prepared in advance (connect two parts and turn it out). This tail must be inserted into the place indicated by the dotted line on the pattern, and stitched with it.

Now that the back and belly are ready, we begin to connect them. We sew only the sides, that is, only 2 seams. At this stage of creating the Teddy bear, I did not stuff the body with my own hands.

Sew a Teddy bear
Sew the head to the bear's body. To do this, our pattern has smooth edges from the bottom of the head and from above on the body. This is probably the most inconvenient part of creating a toy. Maybe, of course, I somewhere did not create a toy very professionally. But in the end it worked!

So, at first it was easy to sew, because the edges of body parts are clearly visible. But then. When the hole got very small, I had to invent a little 🚲. The hidden seam helped.
Further it is already easier. The toy now needs to be stuffed. And close the hole with a hidden seam. Somehow it happened. In my opinion, this Teddy bear's belly turned out to be very big. And the tail also added the length of the lower part. And in general, already something))))


Sew the hind legs in the same way. Our teddy bear turned out to be sitting.

Since I screwed up with a muzzle, I decided to fix the situation with such a stitch in the center (also back with a needle). We'll hide the knot now.

We glue the plastic spout. I used Moment Gel glue.

Trying on the eyes. Then cut off the long hair in the designated places. There are such gaps. We put eyes in them. Again, I used Moment Gel to stick them.


Here we have such a Teddy bear. You know what: it's not quite Teddy anymore. Classic bears - they are like that with blue noses, black eyes, patches. Other Teddies have movable handles and sawdust inside. The same teddy bear, in spite of the pattern widespread in the network, turned out to be somehow special. Maybe because the first experience, maybe because it is handwork, and she is always unique. Or maybe because even toys have their own character, and sometimes the imagination draws us one picture, but materializes a little differently, but more often even better 🙂
As you can see, sew teddy bear with your own hands, in principle, not so difficult. The main thing is to want! Throw away fear and, without thinking for a long time, get down to business. And if you like it, you can develop your abilities in this area. Well, if you don't like it, it's okay. But in any case, the child will get a unique, made loving hands... And children appreciate it very much.
I hope you found it interesting today. See you soon on the Domovyonok-Art blog. Love each other! All the best and the best to you! Your Brownie Elena.
A teddy bear is a toy that exposes its soft sides to almost every little person during sleep; listens to all the grievances accumulated during the day from the girls who have already matured, silently supporting; becomes an irreplaceable friend in games.
Loved by everyone, the clubfoot has been giving joy and touching with its appearance for more than one generation.
But it is not necessary to buy a soft friend in the store, you can sew it yourself. This is not difficult and even interesting to do.
Any kid will definitely like such a gift, especially if it is handmade. Anyone can sew this adorable creature.
I present to you step by step instructions - it will help you understand the intricacies and nuances of making toys, and, I hope, will be useful for everyone. Taking it as a basis, you can create not only a bear, but also any other craft. Everything is limited only by your imagination. Take action and let this article be the starting point for your further journey into the fascinating world of needlework.
So how to sew a bear?
Materials you need:
- The basis of the fluffy "miracle" is a fabric with a soft pile. It can be plush, natural or faux fur, mohair, velvet;
- Additional thick fabric in any other shade for the pads and ears. It will look beautiful if you take a couple of tones lighter, but this is not important. Not necessarily with pile - calico, flannel, silk, suede;
- Pattern paper;
- Pencil or pen, scissors;
- Threads, floss or strong silk threads, sewing needles;
- Black beads or buttons - these will be the eyes;
- Stuffing (cotton wool, synthetic winterizer). Perhaps any old things, rags that have been lying "idle" for a long time.
Having decided on the color of the future bear, choose the right fabric. Plush is usually used. By the way, a nice moment for beginners - "plush" fur hides possible uneven seams, and the toy looks great.


Make a drawing of a pattern on paper or use a ready-made one - download from the Internet or take one you like in any needlework magazine. The soft bear can be of any size, it all depends on the amount of material.

Redraw all parts of the toy onto the fabric. Be sure to add seam allowances when cutting. In places of protrusions and curvatures, it is necessary to make cuts, this will save correct shape products. The number of parts is indicated on the pattern. Items used in additional fabric are marked in yellow.
We connect the parts of the bear in pairs and turn them on the front side, leaving a few centimeters unstitched, through which we will stuff the figure. Leave the ears without filler. The tail is not indicated on the pattern. If you really need it, then it is most convenient to cut it out according to the pattern of the ear.
The most difficult thing in the process of making a bear is the head. Follow the lettering - they must match. First, we sew the side halves of the head along the chin line, then we sew the ears along the cut line and, finally, we stitch the middle of the head between these


Having turned out all the details of the toy with the fur outside, we fill them with padding polyester or cotton wool. Try not to leave voids - place the filler tighter, especially around the head and paws. So, the soft parts of the bear will keep their shape for a long time.
Mark the outlines of the toes on the legs. They can be embroidered with threads or glued on triangles of dark suede fabric. This will give the little bear liveliness.
Carefully cut the nose area to make the muzzle look more expressive. Sew on the eyes. We make embroidery of the floss nose, we sew the mouth. Form the eyelids from light-colored pieces of fabric.
Let's attach the bear's head to the abdomen and make it movable - for this we use a regular thread spool. We wrap it around with a cloth and place it in the neck area, deepening as much as possible. We will collect the edges of the holes in the head and body of the toy on a strong thread and tighten it tightly. Now the toptygin can look around.
Sew the paws to the body using a thick strong thread. Having passed it twice in the places where they are combined, pull the thread tight to the desired position of the limbs and fix the ends, removing them inside. This connection method allows the bear to move its paws and sit.
Our soft beauty is ready!
As you can see, it will not be difficult to sew such a fluffy beauty with your own hands. Also, the bear can be dressed in a jacket and pants - they are also easy to make from colored pieces of fabric. Or just tie a bow.
There are a lot of options for what and how to sew a bear. For example, a toy in the shape of a polar bear will look unusual in the room and complement the decor in an original way. Such a "friend" for little pranksters will be an excellent companion in games. 
Little soft inhabitants of children's rooms can be not only plush. Sewing a bear out of felt or dense coarse calico will be an interesting solution. Such unique gift for a celebration, moreover, created with your own hands, any romantic girl will like it. 
We will not ignore the well-known Teddy bear. This American toy has become almost epoch-making. Today "Teddy" is sold in every toy store and is a constant companion of every third girl you meet on the street. Let's not forget that a panda with his own hands is also a friend adored by children. And now, when we know how and know how to sew a bear, it will be as easy as shelling pears to create this universal pet on our own. 
A hand-made soft toy is not only an exciting and interesting business. This is both a great mood from the result obtained, and the joy of pleasure for everyone who gets this miracle.
I present to your attention the step-by-step process of making a moving paper toy "Bear". The master class will be useful for teachers primary grades, kindergarten teachers, young parents who have small child... It will seem interesting to the kid because the toy's legs move with the help of a thread.
In addition, moms and dads can make such toys themselves and introduce their children to game form with wild and domestic animals. Also, older guys, following step by step and relying on photographic material, can make a teddy bear with their own hands and give them to their younger friends.
For manufacturing, you need the following material:
- sheets of colored paper in blue, red and orange;
- white cardboard (1 sheet);
- PVA glue or pencil;
- scissors;
- a coil of wire with a diameter of 0.45 mm;
- a simple pencil;
- awl;
- a stand for making holes with an awl in the places where the bear's parts are attached;
- spool of thread;
- black thin marker for drawing the eyes and nose of the bear (can be replaced with black paper);
- toy template - bear cub: toy base, rear and front legs (movement elements), washers in the amount of 12 pcs.

Description of work
Step number 1. According to a previously prepared template of a bear cub, it is necessary to cut out “clothes” from colored paper to make the toy bright.
To do this, mark the decoration elements for the bear on colored paper. From orange paper - the nose of a bear, a blouse (upper body), from blue paper - a tie and pants ( bottom part torso).

Step # 2. Now we cut out all the details with scissors.

Step number 3. With a glue-pencil, glue the orange details on the bear (nose, blouse).

Step number 4. Then we glue the blue details in the same way: pants, tie, draw eyes with a black marker and outline the contour of the nose.

Step 5. We take an awl and a stand to make holes in the details - the legs of the toy and on the main part of the bear.

Step number 6. Take a spool of thread and cut off 4 parts from it, each up to 20 cm, then fold it in half (for strength). We pass through the upper holes in the paws of the bear and tie with a knot.

Step 7. To fasten the parts together we need a wire, scissors and an awl.

Step number 8. It is necessary to cut off a piece of wire about 10 cm. Then thread it in this way: washer, main part (body), washer, foot, washer. We twist the ends of the wire with a spring using an awl.

Step number 9. It turned out in this way to attach the upper and lower legs to the body.