The possibilities of crocheting allow the needlewoman not only to create unique items for her wardrobe, but also to make her home cozy and unique with the help of crocheted interior items: napkins, capes, coasters, etc. We offer a master class “air loop using a crochet hook”, which will help beginners prepare for creative process and teach her how to knit.
Preparing to knit will take a little time. For the process, the needlewoman needs a hook and yarn.
How to crochet an air loop with your own hands for beginners
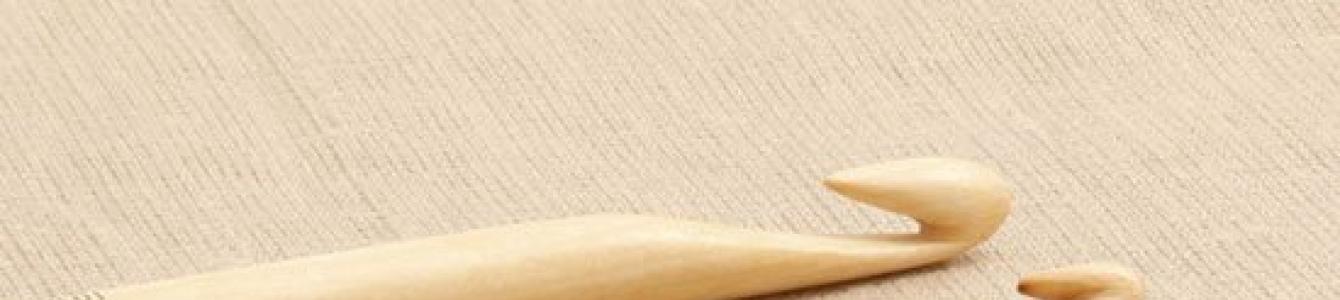
The main characteristic of a hook is its size (number), which is its diameter. The smaller the diameter of the hook, the more elegant and airy the product looks. Beginner knitters usually use a tool from three to five millimeters in diameter.
Hooks are made from different materials. Thin ones are made of steel, larger ones are made of aluminum and other light alloy metals, and large ones are made of bamboo.

Handicraft stores have a huge selection of threads for every taste.

Almost any yarn is suitable for crocheting, but you need to take into account some features:
- Elasticity of the thread. You can check the elasticity by stretching. If the final product will be of different colors, the yarn must be from the same materials and the same elasticity, otherwise the product will not be attractive enough (except for those products that were originally intended to be so);
- Paint fastness. The fastness of the paint is checked simply: you need to take the end of the thread, moisten it with water, put it in white fabric and iron it with an iron. For things that will be washed frequently, you need a long-lasting color.
- Compound. The composition of the yarn is taken into account according to the final result. It is advisable to use the recommendations of the schematic source. The thread can be either natural or artificial, both smooth and fluffy - it all depends on the product.
- Thickness. The yarn is selected according to the size of the hook. Usually the size is written on the package, but you can check it in a simple way: Place the thread on the hook. If part of the thread comes out or goes too deep into the tool beard, it needs to be replaced. The thread should match the size of the hook barb.
How to hold a hook correctly for a beginner?
So, the needlewoman is ready for the creative process. All you have to do is learn how to hold the hook. In order to immediately grasp the tool correctly, it is better to purchase it with a “flattened” part located not far from the hook head.
The crochet hook can be held in two ways: as a pen or as a knife while eating. On this photo shows how to properly hold the hook in two ways:

In order to start knitting, you need to know some conventions:
- Working thread - a thread coming from a ball of yarn;
- Chain air loops– several air loops in a row;
- The working loop is the last loop of the row into which the hook is inserted.
Any knitting begins with the first loop. The first air loop is quite easy to make:
- Take the thread and make one turn around your index finger. We get a ring, which we carefully remove;
- We thread a hook into the resulting loop;
- We hook the working thread;
- We pull the working thread through the loop;
- Tighten the ends of the resulting loop.
This method of creating the first air loop is the easiest. The loop needs to be tightened so that it does not “dangle”, but is not too tight, but moves freely along the hook.
The first loop is ready. Hold the hook with your right hand so that the end of the yarn and the working thread hang down.
- We put the working thread on the index finger, pinch it between the index and middle fingers. Hold the end of the yarn with your thumb;
- We pass the hook under the thread on the index finger and grab it;
- We pass the thread through the loop;
- The air loop is ready.
Every knitter knows that a product can either be invented by itself or taken from any pattern. This is what the pattern for crocheting a napkin looks like:

The air loop in the diagram is indicated by a circle or oval. A chain of air loops is indicated by a chain of horizontal ovals connected to each other.
With the help of a hook, a needlewoman can invent details of clothing, interior design, and even knit toys, both souvenirs and for children.
Knitting a chain of chain stitches is quite simple; you just need to repeat the same steps.
Video on the topic of the article
At the end of the article, we invite you to familiarize yourself with a selection of video tutorials on how to crochet air loops:
They knew how to knit and crochet in the distant past in Rus'. This came to us from Europe: from Spain, Italy, France, England. Craftswomen crocheted mainly lace. The first knitted items were stockings and mittens, and then they began to knit hoods, sweaters, and berets, using only cotton threads. The clothes were simple, but then texts began to be printed on the stockings. It is clear that loops, especially air loops, have been used all this time. In this material we will look at how to properly crochet an air loop; there are many for beginners useful tips from experienced craftsmen.

IN European countries knitting spread with the help of wanderers. This aroused interest among local residents. Over time, girls mastered this skill, and in the twelfth century, needlewomen were already sewing clothes for their entire family. In the fifteenth century knitted clothes becomes popular, and over time it is already found not only in household work, but also in the trade. Knitting workshops were created, where only men worked, and in 1589 the first machine was invented. After this, machine-knitted clothing began to be produced. It is interesting that the value of related things did not just stand still, but also increased many times over.
Let's start the workflow
Today we will talk about how to make a crochet air loop. First, let's take a hook in our hands. There are two ways to hold the hook correctly.
First, you can hold it like a pen:

Secondly, the hook is held like a fork:

How to knit/make:
A. Nodule;
B. Air loops.
A. Okay, that's sorted out. Now we need to make a knot. To do this, we put a loop on the hook so that the working thread is on the index finger, and we hold the tail of the thread with the thumb and middle finger.

Now hook the thread.

Pull it through the loop.

We tighten it. This results in a knot like this:

B. First, we make an initial loop (that is, a knot) and grab the thread with our hook.

Pulls the thread through the starting loop.

This is how we got an air loop. We perform the same actions several times and get a chain of air loops.

It is knitted to the length necessary to obtain the desired width of the item.
Photo of chains made of air loops:


Here are some diagrams of chains of air loops:


Benefits of knitting


Why do people knit? After all, stores are about to explode from an oversupply of things. However, there are advantages and there are quite a few of them.
The item you knit will be of higher quality than in the store, and you will also be able to dress differently from everyone else, thereby being unique and unique.

Crocheting is also beneficial from a medical point of view. In addition to the fact that knitting develops imagination and shapes artistic taste, it also develops fine motor skills. Now the older generation may think: “Why do I need this” or “This is not about me. Only children need this." However, no, you need it too! Over time, we become less agile, we are often absent-minded, and we forget a lot of things. And crocheting will help you, because you need attention, so as not to make a mistake when counting stitches, to follow the pattern.

Many of our grandmothers retained clarity of mind into old age. According to medical theory, picking peas and other grains stimulates brain activity through receptors in the hands. The same can be said about knitting. It is on a par with hardening, physical education, and proper nutrition.
Knitting itself is an excellent relaxation for those whose work involves stress. Scientists share that the same actions when knitting create “monotomy syndrome” - a condition that is very similar to when a person is before bed. That is, the human body completely rests and relaxes. Knitting also strengthens nervous system person. Why can you say this? One psychologist conducted an experiment, as a result of which she proved that a person who simultaneously knits and watches a horror film stops reacting to scary and creepy scenes. What conclusion can be drawn from this? Knitting protects a person from stress and anxiety. If you suffer from depression, try knitting. It doesn't seem like a fun activity. However, this is only at first glance. A person chooses the colors himself (in medicine there is even such a thing as color therapy), as well as the style of his product. It helps a person recharge. positive emotions and get a boost of optimism. Knitting also improves a person's self-esteem.
Hello, I am glad to see all of you, dear participants, at the first lesson of our course.
After meeting you (thank you for your kindness and positive attitude), I concluded that most of you are not just familiar with crocheting, but are fluent in it. , but at the same time, for some reason, they feel insecure, think that they don’t know, or are missing something important
I immediately warned that we have Crochet course for beginners!
which means that we’ll start from the very beginning and most likely won’t get to “Ireland”.
Therefore, think carefully again: do you need this?!
I wouldn’t want you to get disappointment and regret about wasted time instead of new knowledge.
Have you thought about it? Then let's get started.
Let's consider such a controversial and always pressing question - How to hold a hook correctly?
To begin with, I would like to introduce you to one artist.
This is 41-year-old Huang Guofu. He was left without arms after being hit electric shock at 4 years old. Since the age of 12, he has been painting, holding a brush in his right leg or mouth.
Please tell me if he is holding his brush correctly?
The pictures turn out right?!
Knitting is also creativity, and there are no strict boundaries here either.
It doesn’t matter which option you use, it doesn’t matter which hand you knit with (left or right), or maybe you will invent your own method and be able to knit with your foot, mouth or ear and you will succeed - that means your method of holding the hook is correct!
Feel free to use it and don’t listen to anyone!
In the meantime, while you haven’t yet invented your own special way of holding a hook, let’s look at those that exist.
Usually the hook is held in the right hand and the yarn for knitting in the left.
Lefties can knit the same way or vice versa.
Option 1 - Straight Grip
The hook can be held like a pen (or pencil), pinched between the thumb and forefinger. The hook slides easily over the middle finger. 
The middle finger can also lie on the hook and hold the loops. 
Second option - Reverse grip
To do this, you need to place your hand over the hook and grasp it, as if you were holding a knife in your hand. This option may be more familiar if you know how to knit. 
I would like to add that thin hooks without a handle, as well as hooks with an ergonomic handle, are more comfortable to hold like a knife. This method is also used when knitting with thick yarn;
when knitting irregular mesh in Irish lace and in other situations.
In my opinion, the first option seems to be the most convenient, since it provides greater mobility of the hook head, and when knitting, just the movements of the fingers of the right hand will be enough. Handles get tired less, and knitting only brings pleasure.
Try both options. Use the one that is most convenient for you.
I repeat once again - both of these options are correct!
And we will not argue with those who think otherwise,
Let’s smile back and continue knitting, as it’s convenient for us!)
So the hook is in the right hand, what does the left hand do?
It is responsible for feeding and tensioning the thread (yarn). Thread tension control ensures comfort and uniform knitting density. The end of the thread (then the fabric) must be held with your thumb and middle finger. The thread should be placed over the index finger and held inside the palm. You can additionally pass the yarn between ring finger and the little finger or wrap the thread around the little finger. This will allow you to adjust its tension.
Let's start knitting.
Look carefully at the drawing.
Make a loop and insert the hook into it as shown in the picture above. Now grab the working thread, that is, the thread going to the skein. Pull it through the loop and tighten, but not too tight.
You have the first loop on your hook - the initial loop.
Next we will make a chain of air loops.
As a rule, the zero row of any product is made from it, as well as air, openwork motifs. How to crochet an air loop? We grab the working thread and pull it through the loop on the hook. We also perform all subsequent air loops (abbreviated VP). In knitting patterns, this element can be indicated by a circle or an oval. Carefully examine the resulting chain. The initial loop is a tack stitch, zero. Columns will not be knitted into it in the future. The loop that remains on the hook continues knitting and is also not included in the count.
Task number 1 - Dial a chain of 1000 VPs.
No, I didn't make a mistake with the zeros. No, not much. No, you won't get tired. Yes, definitely
Of course, you don’t have to count the loops; you can measure the first twenty loops with a centimeter and knit the required number of meters. or put a marker after every 20-30 or 50 loops)
Do not pull the loops too far, do not tighten them too much, make sure that they are the same along the entire length of the chain and that the hook can easily fit into each of them. You can knit with one crochet hook, or try different ones. Try changing the yarn, try different hooks for different yarns. Let your eyes and hands get used to the hook.
In the comments we will talk about how to hold the hook, how to make the first loop, and also post a photo of the finished chain.
Show your imagination, let us be interested in looking at your photos!
For the future, when recruiting large quantity loops, you may find this advice useful:
It is very convenient to cast on a chain of chain stitches and knit the first row of various balls on it.
Take the first ball, cast on a chain of chain stitches, not counting approximately the required length, and leave it. Then take another ball and start knitting the calculated number of elements from the beginning of the chain. If you have not collected enough air loops in the chain, you can add them; if the air loops remain redundant, then by pulling the thread with which the chain was knitted, remove these extra loops (the chain is tightened) and tear off the thread with which the chain was knitted. Continue knitting with thread from the ball that was used to knit the first row.
Knitting as a look self made, known in different countries. This is a combination of threads and additional elements that allow you to recreate the motifs of the pattern. The crochet technique has become popular due to its simplicity and speed of execution. Thanks to a simple tool, it is possible to create beautiful openwork elements and complex motifs. The basis of the work is considered to be a crocheted air loop, which is easy to learn to knit.
To knit air loops correctly, you need to adapt to holding the hook in accordance with the requirements. For this, two options are offered: as a pencil (an extensive working area is created, allowing you to perform various complex motifs), as a knife (offered to novice craftswomen who learn the basic elements of the technique). There is no need to limit yourself in choosing a method; you can try to work and compare two techniques. The main thing in the process is convenience.
Before starting the process, an initial loop is made; for this, the yarn is folded in half and the warp thread is pulled through the resulting loop. The resulting element is the first loop in the work and then the remaining links will begin from it.
For convenience, you can hold the threads with your thumb and middle finger, wind the yarn several times on your hand so that during knitting it does not sag and the loops come out neat and even.

To make the first chain stitch with a crochet hook, just pull the warp thread through the link on the back of the tool and throw it onto a new one. After this, tighten the thread a little so that the base is even and neat. Perform the next links in the same way. The result of knitting will be a long chain. The remaining rows will be superimposed on it and the process will change from vertical to horizontal.
When counting the number of elements, each air loop is separate, the warp loop is not counted. If in the knitting technique additionally knitted, but not included, edge loops, then this is not the case here and the fabric is made with a uniform pattern. After completing the knitting, you can further decorate the edges of the item by processing them with a tool.
Making crocheted loops for beginners will not be difficult if you practice a little beforehand and choose a uniform, medium-thick cotton yarn. This thickness will make it possible to monitor the quality of the loops and control the tension of the thread.
Main types of loops
To create a pattern are used different types elements consisting of one or more yarn overs. The knitting technique can be performed using either one type of pattern or alternating types of links to obtain a unique product. The main type includes:
More complex combination options include relief inserts, made with or without crochet on the front and back sides. Needlewomen can combine not only different knitting options in one product, but also tools for the process. For example, additional knitting needles will help create a three-dimensional pattern or knit a braid, crossing threads from left to right.
Mosaic technique
To master the process of making loops using a hook and create beautiful things, it is enough to practice several key combinations and substitute their elements into the process . Mosaic knitting belongs to the initial level of complexity and consists of simple components. For the procedure you will need a hook and yarn, although you can replace this element with knitting needles, the pattern will not lose its attractiveness.

Since mosaic is a universal knit, to decorate the border you can use both columns and complex elements, as well as ordinary links, neatly tightened under each part and quite even.
Crocheting an air loop to decorate the edging is not difficult, the main thing is to connect it to all parts of the knitting without skipping loops.
Crochet spikelets
For the base, a number of links is a multiple of three and an additional lifting loop. The first line consists of an air element for the transition to a new row and single crochet motifs in each base link. Visually reception raises mating and makes it lush and dense. If you knit the spikelets without this row, the pattern will turn out loose and the yarn will quickly stretch.

The pattern can decorate a sweater or scarf, or complement a beautiful tunic or dress made of cotton yarn. The motif is considered universal and can be used both in techniques with a single tool and for knitting needles.

Types of patterns
There is no exact number of patterns created by crochet. We can only talk about rough estimates. Knitting techniques have evolved over several eras in different countries and with all sorts of tools. Nowadays it is customary to use the easiest modification - crochet.
Using the tool you can make patterns such as:


Simple patterns are created by alternating simple loops and single crochets. To create complex options, additional techniques of weaving threads are used. The formation of several rows strictly according to the pattern and with the implementation of the structure is called knitting. Not only the density, elasticity, and durability of the canvas, but also the visual design of the product depends on the type of technology chosen.
Don't think that expensive yarn and a correctly chosen scheme guarantee a beautiful thing. To create, you need to work hard and practice the technique. The basis will be knowledge of how to crochet air loops for beginners, because this is the main element of the work.
In the process of making components, you need to look at the thread tension; it should not be too tight, but not drooping, so that the loops are nice and even. If you need to change the thread to another, then you should not make knots, because crocheting creates double-sided patterns, and knots and incorrect thread transitions can worsen the look. Also You can’t choose yarn of different thicknesses, because this will cause the uniformity of the canvas to be lost and the pattern may become sagging.
Beginning craftswomen may make mistakes when knitting loops, pulling the thread not through the bow, but through one of the walls. In this case, it will not be possible to convey the pattern and each new row will be horizontally separated from the previous one by a line. The back and front walls of the base are used if knitting is done with knitting needles and you need to make a three-dimensional pattern. Then alternating loops and additional openwork elements will help to recreate the schematic symbols.
Each time before starting a new row, it is necessary to stretch the already knitted motif so that all links have the same tension of the threads, and distortions and tightening of the loops do not occur. If an error is found in a row, it is better to rip out the excess knitting and return to the starting position rather than continue with the erroneous element. You can make a double crochet near the problem loop and knit two links as one. This will allow you not to repeat the mistake in the remaining rows, but to follow the instructions and description.
Products made from yarn will always be popular and in demand. Handmade items can decorate the wardrobe of even demanding fashionistas and surprise others with their originality and originality.


