For those who like to constantly update their wardrobe with interesting and classic things, our master class offers a lesson on how to sew a jacket in the Chanel style.
It is worth noting that implementing this project is quite simple, especially if you have already held a needle and thread in your hands, the main thing is to know some of the nuances of this particular model.
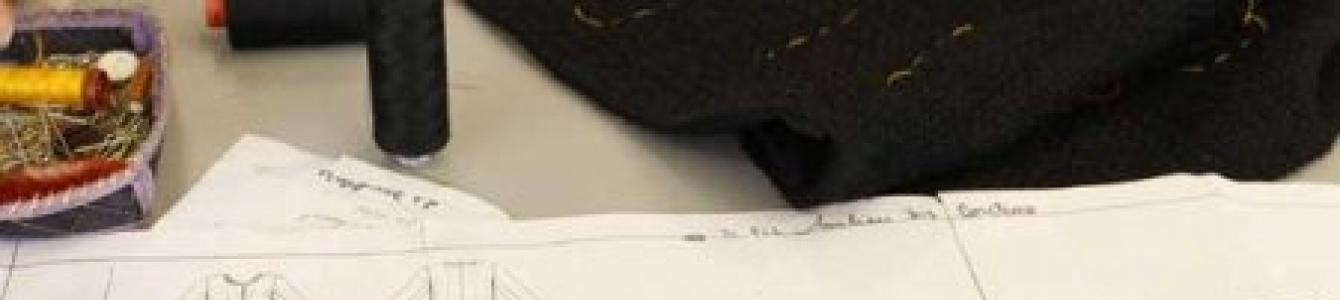
The first step is to use the quilting method to join the base material to the interlining fabric. As a rule, soft, well-draped, bouclé wool is ideal for Chanel-style jackets. And products made from such fabric are treated on the reverse side with lining fabric, which is attached to the base with machine stitches. As a result of this method of fixation, it is possible to achieve a special softness of the lining used.
At the cutting out stage, you should use muslin for the base, onto which the pattern of all the details is transferred. Once the fit is marked on the fabric, you can unravel and press all the pieces, and the seam allowances can be trimmed. This process allows you to place parts made of this material along the shared threads, and no longer use a paper pattern. It is imperative to mark the direction of the grain thread on muslin patterns.
Then the main material (bouclé wool) is laid out on the table in one layer, on which all the details of the product that were previously cut from muslin are placed. For designation, a thread of a contrasting color is used, which is used to sew each part. Now the parts can be cut from the base material with five centimeters of seam allowance added on each side.

The next step is the process of quilting two layers of the product. In this case, the outer and lining, for which the lines are made at a distance of two and a half centimeters from each other. We place the lining with the wrong side facing up; all the parts made from the base material should be placed on top of it, only with the right side facing up. Be sure to align the grain thread between the two materials. Then all the laid out parts should be cut out of the lining fabric, keeping to the same dimensions.

After this, using a special walking foot on a sewing machine, you can stitch all the parts at the selected distance. This process should be carried out quite carefully, and the lines should be as straight as possible.

After you have stopped quilting, you should carefully secure the threads between the two quilted layers. The elongated ends of the threads should be secured using a jeweler's knot and trimmed to one centimeter.
Please note that the seam allowances on this product are quite large, which is really necessary. This is explained by the rather loose structure of the fabric itself (boucle wool), and this material also shrinks strongly during sewing.
The second rather important stage in this work is the numerous manual work that begins with the seams on the lining fabric.
It should be borne in mind that using hand sewing you can quite tightly control the behavior and fixation of many fabrics, which include almost all linings. Thus, it is recommended to manually sew all the details of the product, acting carefully and without touching the parts of the lining fabric. That is, you should sew only parts from the main fabric along the intended seam lines. Then you can use the walking foot of the sewing machine again for long stitches. It is recommended to unscrew the lining pieces using sewing pins before starting this work.
Once the details of the jacket are assembled, you can try it on to eliminate various nuances. Only after the product fits perfectly can all seams be sewn with a regular stitch, after which the basting stitches can be removed.
Now we connect the lining part of the jacket and the main part, making sure that the seam lines are aligned. Do not pull the fabric under any circumstances, but gradually fasten them together using pins. You need to start and then finish fastening the lining at a distance of five centimeters from the bottom of the jacket and at least two and a half centimeters from the seam.
After the lining with the base is fixed over the entire area, the top layer of lining fabric should be folded along a pre-designated line. The folded edge is then hemmed. For convenience, you can pre-iron the folded edge to mark a clear seam line.

The next step is to sew the sleeve into the armhole, which is best done by hand, and then finish the design of the neckline and the center of the front. To make it easier to sew on the sleeve, you can use a mannequin, if you have one. It is necessary to clearly monitor the direction of the grain thread, which must coincide in the two layers of the jacket. Now you can begin to strengthen the neck line and the center of the shelf, after which the excess allowances are trimmed and the product is turned inside out so that the allowances remain inside the shelves. It is recommended to secure the lining to the main product with small stitches.

It should be noted that Coco Chanel always used jackets with various jewels and decorative buttons.

In our case, we will use chains along the bottom of the product to give the necessary weight. The chain is sewn on by hand, making sure that it is not too tight.

An additional decoration of our bouclé jacket will be a finishing braid in the form of a pigtail, which is fixed along the edge of the collar and front shelf. In addition, decorative braid adorns the bottom of the product and the bottom of the sleeves.

The jacket has four patch pockets, which are located in pairs one above the other on both front shelves of the product.

Please note that the pockets should be trimmed before they are sewn to the jacket. There is a braid along the top edge of the pocket, and a button in the center.


 Today I am pleased to introduce you to my new trainingvideo course
"CLASSIC JACKET FROM CHANEL"


| JACKET "FROM CHANEL" - HOW IT'S MADE |
E

E If the image is cloudy, hover over the video, there will be a gear at the bottom right,
click on it and select the best quality video
The jacket is made of pink wool tweed
This model preserves all the classic traditions of sewing jackets of this type.
- The jacket is lined with silk, which is sewn directly to the jacket itself using vertical stitches.
- The cut of the armhole has been changed at the top
- Three-seam sleeve
- The vent on the sleeve is located along the central top seam, fastens with a button
- Semi-fitted silhouette, cropped jacket
- Single-breasted fastening, metal buttons on the leg, elegant
- The shelves have 4 lined patch pockets
- The entire jacket is decorated with handmade decorative braid
- The bottom of the jacket is reinforced with a chain on the reverse side
- The jacket is sewn without the use of duplicate adhesive elements
In this video course, all operations are shown and explained in detail.
1.
taking measurements
2.
building the base of the back, front, sleeves
3.
modeling
4.
cut
5.
creating decorative braid
6.
fastening the lining
7.
step-by-step assembly of the entire jacket
8.
wet-heat treatment
9.
manual operations
The classic Chanel jacket is a universal and simply irreplaceable model in the wardrobe of a woman of any age and build.
This jacket can be worn with a dress, skirt, trousers, jeans. Any place and any time of the year.And most importantly, it NEVER GOES OUT OF FASHION


E If you want to become an expert in precision cutting, using the sections of the course devoted to taking measurements, creating basic patterns, you can use it when sewing any shoulder products, making changes when modeling, then this course is for you!!!
E If you don’t want to spend money on buying a store-bought jacket, which is still not made according to your individual measurements and not from the fabric you like - Yes, this course is for you
E If tailoring in an atelier with a lot of fittings taking up precious time is inconvenient for you - this course is for you
E If you have a simple sewing machine that makes 1 straight stitch and a household iron, Yes, you can sew such jackets for yourself and your family, you just need to have my course at hand
WITH correct for both an experienced sewing enthusiast and a beginner
D The point is, to learn how to sew such wonderful jackets using my video course, you don’t need any level of skill or knowledge in the field of tailoring. It is enough to be able to confidently perform a straight stitch on a sewing machine.
IN everything else is shown step by step in the video. I take you by the hand and lead you from the process of taking measurements to the finished product
P There is no need to memorize anything. Just repeat after me and create a masterpiece
E like embroidery kits, where the basic preparation and instructions have already been done for you, a pattern on the fabric has been prepared, threads have been selected according to shades, all that is required of you is accuracy and love for the work being done
I I wish you creative success and victories in such an exciting business as cutting, modeling and sewing clothes
IN Believe in yourself that everything will work out
A I will help you with my new video tutorial
I AM WAITING FOR YOU IN THE RANKS OF MY STUDENTS

“I don’t want my things to be admired. I want them to be worn.” Coco Chanel
A Not everyone can wear an original Chanel jacket. Because it is very expensive
N Finally, this classic flawlessness will be in your wardrobe!
T Now you can do it yourself, for any figure, with minimal sewing experience.
sew a Chanel jacket according to all the rules!
IN You will learn to take correct measurements, create basic patterns for shelves, backs and
two-seam sleeve, model exactly this model, cut, stitch the parts correctly,
create decorative braid with your own hands and much, much more!
E This model carries all the characteristic features of the classic Chanel jacket:
- material tweed
- semi-fitted silhouette
- lack of lapels and collar
- neckline
- single-breasted 5-button fastening
- vents with fastening on sleeves
- 4 patch pockets
- braid trim
and the MOST ORIGINAL! lining that is completely sewn to the jacket itself
You will learn all the inner secrets of this complex process, and learn how to DO it
Such a training video course cannot be cheap, but we do not inflate the price because
We also want our students to not only admire beautiful clothes
WE WANT THEM TO WEAR IT!
ABOUT an original Chanel jacket costs from 150,000 rubles and above
AND A suit sewn by your own hands - from 3000 rubles and up for as much as you want
P The process of creating such a jacket is creativity in its purest form, it is meditation and pure
a treat for all sewing lovers!
The finished product will delight you not just for one season, but for many years, because thisA Fashion Legend will never go out of fashion
ONLINE VIEWING OR DOWNLOADING DIGITAL VERSION VIA THE INTERNET
REGULAR PRICE - 5295 RUBLES
COURSE PRICE AT A DISCOUNT - 4236 rubles.
4236 rub. It's not the price = it's the value
If you choose this shipping method, you can start taking the course much faster. As soon as the payment arrives in my account, You will receive links to download the course from the server
download the electronic version or view online:
IN THE IDEA COURSE CAN BE DOWNLOADED OR WATCHED ONLINE by paying for it using any of the presented payment methods, except cash on delivery
E If you choose this delivery method, you will be able to start your course much faster.
As soon as the payment is credited to my account, you will receive links to download or directly view the course from the server. With this method you save on delivery and time. Download time takes from 30 minutes to 1 hour. Viewing starts instantly
TO urs weighs 11.8 GB. Downloading occurs from the mail cloud
P After downloading, you can copy the files to a DVD or flash drive. If your downloaded files get lost, I will resend them free of charge at any time
Z and for 8 years of my activity there were no problems with downloading and viewing the electronic version of the course. No special computer settings required
Find out more about purchasing the version on a flash drive or DVD
by e-mail =
or in contact -
It's hard to find a more iconic item than the classic Chanel jacket. If you were lucky enough to be the owner of one of these jackets, then you probably noticed the incredible structure of the fabric and the lightness of the product itself. But the most important thing is that you are imbued with that dazzling aura that can only be created with the help of real magic. In this lesson we will model a jacket pattern in the Chanel style, and in the next one we will dwell in more detail on the technology of sewing the product.
A little history
The fabric from which famous jackets are made (and which is often called Chanel matting) has a loose, movable structure and frays very much when cut. However, this fabric lends itself well to molding and holds its shape well. Since 1924, Chanel's signature tweed fabric has been produced in one of the Scottish factories. Mademoiselle personally chose the colors for her fabrics, inspired by the colors of the surrounding fields, greenery, flowers and earth. The fashion for tweed spread like wildfire - the richest fashionistas in France wanted to have such products in their wardrobe.
In the 1930s, production was opened in the north of France, and it was from this time that Chanel began to combine her favorite tweed with wool, silk, cotton and even cellophane to give the products an even lighter weight and more creative possibilities. Tweed remains a significant part of the history of the Chanel brand to this day, and Karl Lagerfeld, who stood at the helm of the fashion house for many years, rethought the traditional fabric and, most likely, Mademoiselle Chanel would not want it to be any other way.
Corporate style of Chanel jackets
A Chanel style jacket is easy to recognize; it has a unique and clear style:
- Branded fabric - loose, light, free-flowing, voluminous.
- Signature cut - shortened, fitted or semi-fitted silhouette.
- Narrow three-seam sleeves. The sleeves on Chanel jackets consist of 3 parts, but they are very comfortable and do not restrict movement.
- Patch or false pockets. There may be 2 or 4 pockets, but they are usually located in pairs, the top pair is slightly smaller in size, the bottom pair is slightly larger. Some models may not have pockets.
- Branded trim on the neckline, sides, sleeves and pockets - expensive braided cords, fringe, chains, etc.
- Buttons with pearls or Chanel logo
- Signature stitch and chain sewn on the bottom of the jacket.
Rice. Elements of the corporate style of a Chanel jacket
If you have at least once held a signature Chanel jacket in your hands, you could not help but notice the subtleties of processing of the product, which create the real Chanel style.
Let's take a closer look at exactly what accents the master places.
- Jackets are never backed with adhesive interfacing, but are hand-quilted using a quilting stitch. Organza acts as a gasket, which stabilizes the moving fabric, prevents stretching and literally “holds” the entire structure.
- The lining is sewn to the jacket by hand using a fine beaded stitch (back-needle stitch). This creates a one-piece design consisting of 3 layers of fabric - main, organza and lining. Silk is used as the lining of the blouse. It is considered especially chic to have a blouse made of the same silk, which can be worn with a jacket.
- Most of the seams when sewing a jacket are done by hand, including organza stitching and lining. The threads are matched to the tone of the main fabric or lining.
- The pockets are edged with lining and sewn onto the product by hand.
- The chain along the bottom of the product is also sewn on by hand and serves as a counterweight to the heavy buttons sewn onto the front.
There are many subtleties, but the one who walks will master the road. If you are ready for a new step in your relationship with fashion, be sure to sew a jacket in the Chanel style!
But first of all, let's make a jacket pattern. As a basic pattern for modeling, it can be used with a 3 cm allowance for a loose fit. The version of the jacket that we want to offer is one of the many “variations on the theme” and differs from the classic one by the presence of a non-standard sleeve (modeled according to) and two raised seams along the front. The jacket does not have a half-skimmed front and is fastened with large hooks, which are sewn on the reverse side of the fronts, decorated with knitted cords and two large decorations with stones.
Rice. Sketch of a jacket in the Chanel style
Modeling the front of a jacket
Shorten the length of the shoulder from the extreme point by 2 cm and draw a new line for the front armhole. Deepen the neckline by 2 cm and increase its width to the right side of the bust dart. Divide the length of the neckline in half and draw the right relief line as shown in Fig. 1.
On the shelf, mark the C.G. point (Center of the chest) with a cross and move the chest dart to the left so that the C.G. point is located in the center between the two relief lines. Divide the length of the armhole line in half and draw a second relief seam line close to the top of the bust dart. Glue the middle piece along the lines of the chest dart and lightly align it along the left side.
Divide the tuck solution in half and transfer it along the relief lines as shown in the pattern. The length of the jacket from the waist line is 12-15 cm (depending on your size).
Rice. 1. Modeling the front and back of the jacket
Modeling the back of the jacket
Deepen the back neckline by 2 cm and increase its width by 4 cm. Draw a line for the back neckline. Shorten the shoulder from the extreme point by 2 cm. Draw a new armhole line, divide its length in half and from the resulting point draw a relief line passing through the waist dart.
Shorten the length of the back from the waist line by 12-15 cm.
Jacket sleeve modeling
Rice. 2. Modeling a three-seam sleeve
Draw dotted lines for modeling the front and back of the sleeve. Align the details of the middle part of the sleeve as shown in Fig. 3. Adjust the stitching line of the right sleeve part.
Rice. 3. Modeling a three-seam sleeve
How to cut a jacket
To sew a jacket you will need: about 1.3 m of fabric 145 cm wide, about 1.3 m of rigid organza as a lining, 1.3 m of blouse silk for lining, 2 large hooks, 2 decorative elements, about 3.0 m of finishing cord, thread to match Madeira Aerofil No. 120.
All details of jacket 11-18, shown in Fig. 4, cut out with seam allowances of 2 - 2.5 cm, at the bottom - 6 cm. Cut out the lining parts without seam allowances, cut out the lining parts with 3 cm seam allowances (when quilting, the fabric can shrink significantly).
Rice. 4. Details of the jacket cut with stitch markings
Each piece comes with a quilting guide. It is necessary to retreat 7 cm from the bottom of the jacket, 5 cm from the side cuts without taking into account allowances. The distance between the lines is about 5 cm.
See the next lesson. See you again at the Sewing School!
For those who like to constantly update their wardrobe with interesting and classic things, our master class offers a lesson on how to sew.
It is worth noting that implementing this project is quite simple, especially if you have already held a needle and thread in your hands, the main thing is to know some of the nuances of this particular model.
The first step is to use the quilting method to join the base material to the interlining fabric. As a rule, soft, well-draped, bouclé wool is ideal for Chanel-style jackets. And products made from such fabric are treated on the reverse side with lining fabric, which is attached to the base with machine stitches. As a result of this method of fixation, it is possible to achieve a special softness of the lining used.
At the cutting out stage, you should use muslin for the base, onto which all the details are transferred. Once the fit is marked on the fabric, you can unravel and press all the pieces, and the seam allowances can be trimmed. This process allows you to place parts made of this material along the shared threads, and no longer use a paper pattern. It is imperative to mark the direction of the grain thread on muslin patterns.
Then the main material (bouclé wool) is laid out on the table in one layer, on which all the details of the product, which were previously cut from muslin, are placed. For designation, a thread of a contrasting color is used, which is used to sew each part. Now the parts can be cut from the base material with five centimeters of seam allowance added on each side.

The next step is the process of quilting two layers of the product. In this case, the outer and lining, for which the lines are made at a distance of two and a half centimeters from each other. We place the lining with the wrong side facing up; all the parts made from the base material should be placed on top of it, only with the right side facing up. Be sure to align the grain thread between the two materials. Then all the laid out parts should be cut out from the lining fabric, keeping to the same dimensions.

After this, using a special walking foot on a sewing machine, you can stitch all the parts at the selected distance. This process should be carried out quite carefully, and the lines should be as straight as possible.

After you have stopped quilting, you should carefully secure the threads between the two quilted layers. The elongated ends of the threads should be secured using a jeweler's knot and trimmed to one centimeter.
Please note that the seam allowances on this product are quite large, which is really necessary. This is explained by the rather loose structure of the fabric itself (boucle wool), and this material also shrinks strongly during sewing.
The second rather important stage in this work is the numerous manual work that begins with the seams on the lining fabric.
It should be borne in mind that using hand sewing you can quite tightly control the behavior and fixation of many fabrics, which include almost all linings. Thus, it is recommended to manually sew all the details of the product, acting carefully and without touching the parts of the lining fabric. That is, you should sew only parts from the main fabric along the intended seam lines. Then you can use the walking foot of the sewing machine again for long stitches. It is recommended to unscrew the lining pieces using sewing pins before starting this work.
Once the details of the jacket are assembled, you can try it on to eliminate various nuances. Only after the product fits perfectly can all seams be sewn with a regular stitch, after which the basting stitches can be removed.
Now we connect the lining part of the jacket and the main part, making sure that the seam lines are aligned. Do not pull the fabric under any circumstances, but gradually fasten them together using pins. You need to start and then finish fastening the lining at a distance of five centimeters from the bottom of the jacket and at least two and a half centimeters from the seam.
After the lining with the base is fixed over the entire area, the top layer of lining fabric should be folded along a pre-designated line. The folded edge is then hemmed. For convenience, you can pre-iron the folded edge to mark a clear seam line.

The next step is to sew the sleeve into the armhole, which is best done by hand, and then finish the design of the neckline and the center of the front. To make it easier to sew on the sleeve, you can use a mannequin, if you have one. It is necessary to clearly monitor the direction of the grain thread, which must coincide in the two layers of the jacket. Now you can begin to strengthen the neck line and the center of the shelf, after which the excess allowances are trimmed and the product is turned inside out so that the allowances remain inside the shelves. It is recommended to secure the lining to the main product with small stitches.

It should be noted that Coco Chanel always used jackets with various jewels and decorative buttons.

In our case, we will use chains along the bottom of the product to give the necessary weight. The chain is sewn on by hand, making sure that it is not too tight.

An additional decoration of our bouclé jacket will be a finishing braid in the form of a pigtail, which is fixed along the edge of the collar and front shelf. In addition, decorative braid adorns the bottom of the product and the bottom of the sleeves.
If you love to sew and are attentive to details, you should try to make your dream come true - sewing a circuit board from the podium with your own hands. Even if you are just an amateur and do not have design skills, such an idea is possible with Burda patterns.
This master class is dedicated to a tweed dress from the SS/2014 collection of Karl Lagerfeld for Chanel.
Let's take as a basis the pattern of a dress with a fitted silhouette, model 118 from:
Pattern:
At the junction of East and West: a colorful dress made of bouclé fabric with woven grosgrain ribbons…
General changes to make to the pattern:
✂ Reduce the depth of the armhole - raise it by 2-3 cm.✂ Neckline and front slit line - adjust them by hand, widening the neckline and deepening the slit. Or, using the dress bodice pattern, model 116 from - simply transfer the neckline area to your pattern.
Pattern:
There is always a reason to show off on the parquet floor when you have a wonderful dress up to…
✂ Cutting part at the bottom of the front - draw a cutting line at a distance of 19−20 cm from the waist (approximately at mid-thigh level);
✂ Pockets - instead of 2, cut out 4 pieces. In addition, move the pocket location marks above the cutting line;
✂ Plank for a butt fastener - cut out a strip 42 cm long and 7 cm wide, taking into account an allowance of 2 cm (in finished form, the width of the strip is 3 cm, the length is 38 cm).
Individual adjustments:
- Length of the product
- Degree of fit
: master class on the site
- Darts - depth, additional
- Height of side cuts
- Front cut depth
- Shoulder length
You will need:
- Chanel style fabric 1.20 m wide 140 cm;
- Lining fabric (silk or cambric) 1.00 m, width 140 cm;
- Non-woven fabric backing;
- Sewing threads and needles;
- Knitting;
- Crochet hook;
- Decorative buttons for clothes 4-5 pieces;
- Buttons 11 pieces;
Step 1

Transfer the details of the dress pattern to the fabric and cut it out with an allowance of 2 cm. For the hem - 4 cm.
Step 2

Transfer the contours of the darts using a snare.
Step 3
Baste darts on the details of the shelves and back. Stitch.Step 4

Cut out the trim piece from the main and lining fabric, measuring 42x7 cm, taking into account allowances.
Step 5

Duplicate the trim piece with non-woven fabric backing.
Step 6


Place the trim and lining pieces right sides together, pin and stitch, leaving one long section open.
Step 7

Cut the corners and turn the plank right side out.
Step 8

Form the corners of the plank using a special peg.
Step 9

Using oblique stitches, sweep out the lining of the plank with a slight roll. Iron.

Remove the snares.
Step 10


Place the plank and left side of the shelf right sides together.


Pin and stitch 2cm from the edge.
Step 11


Pin together the parts of the shelves and back along the side seams. Stitch.


Iron the allowances. Trim to 1.5 cm.


And grab them with oblique stitches to the details of the shelves and back.
Step 12


From silk cambric, cut out the lining details - the shelves and the back. Make darts. Baste the pieces along the side seams and stitch. Iron.
Step 13
Place the part of the top of the dress and the lining with the right sides facing each other, with the placket for the fastener on the inside.
Baste along the outer contours, armholes, and neckline, leaving the hem and shoulder seams open.

Stitch.
Step 14

Trim the seam allowances to 1.5 cm. Notch in the rounded areas.
Step 15


Turn the top of the dress right side out.
Step 16


Sew the shoulder seams on the dress. Iron it out. Tack the seam allowances to the dress using bias stitches.


Then sew shoulder seams on the lining pieces. Iron it and turn it right side out.
Step 17


Sweep the lining with a slight roll.


Iron.
Step 18


Cut out bias tapes from silk cambric and apply them to the open sections of the skirt halves along the bottom and side seams. Iron.
: Master Class
Step 19


Fold the parts of the skirt halves in half and mark the middle.
Step 20

Place the skirt pieces right sides together. Mark the height of the cut. In this case it is 19 cm.

Pin the pieces together above the cut. And machine stitch with an allowance of 2 cm.


Press seam allowances.
Step 20


Hem the bottom of the skirt by hand with a 4 cm allowance. Also hem the side seam allowances using a blind stitch.
Step 21

Pin the skirt and top of the dress along the open edges, aligning the side seams and the lines and middles of the parts. Stitch.


Iron the allowances.
Step 22
Tack the lining allowance using bias stitches.Step 23

Turn the lining allowance inward and pin exactly into the stitching seam of the skirt.

Sew the lining by hand using a blind stitch.
Step 24

Edge the open edge of the seam allowance with bias tape. Iron and hand sew it to the skirt using blind stitches.
Step 25

Sew the lining to the dress using a dot stitch.


Step 26


Place the pocket pieces right sides together with the lining.

Pin it together.

Stitch, leaving an open area for turning. Turn out your pockets. Sew up the open hole by hand. Iron the pockets.
Step 27

Weave a braid from multi-colored threads to trim the dress.

You can crochet the most ordinary braid. Or buy ready-made braid in a suitable color.


Turn the braid over with the wrong side up and hand sew it to the dress.


And pockets.
Step 28

On each shelf, place two pockets, the distance from the stitching seam of the skirt is 1.5 cm and 4.5 cm from the mid-front line.

The distance between pockets is 4 cm.


Pin the pockets and sew them to the dress by hand using a blind stitch.
Step 29
Perform the fastening.
First, sew the buttons to the dress and placket. Then sew on the buttons.

On the right shelf along the edge, make “straight” hinged loops, for example, from a hat elastic band. In this master class, the loops are crocheted (braid).


Sew with pleasure!


