We will need: thick threads (more than 200 meters), 50-60 cm elastic bands 3-4 cm wide or a hairpin, a piece of felt or felt 5x(15-25) cm, scissors, sewing threads of the appropriate color.
1. Select threads. For Malvina or the sea robber we will take blue threads, for Pippi - Longstocking - red, for the mermaid - green. You can get creative and make 4 wigs for the Beatles, or make a multi-colored wig from leftover threads.
2. We wind the threads onto a base having a diameter equal to the length of the future hairstyle. We wind two-thirds of all threads, since shorter hair will be sewn on the back of the head. Cut the threads in half. We take threads that have more short length and also cut them in half.
3. Cut out a piece of felt. Its length should be equal to the distance from the back of the head to the forehead. We distribute the hair in such a way that the shorter ones are sewn to the back of the head. Leave a small strand. We begin to sew: first we bait it by hand, and then we sew it on a machine.

4. We sew everything on a typewriter. We try to sew so that an even “parting” is formed.

5. Now we need to ensure that our “hairstyle” is in such a state that it will stay well on the head. To do this, you need to sew on a hairpin or elastic band. An elastic band is preferable; it will make the structure more stable. Cut a piece of elastic along the circumference of the head and sew it into a circle.

6. Sew a strip of felt with hair to the elastic band.
Articulated ones have the ability to change body parts, including wigs. Thanks to this, you can create your own original image. But this hobby is not the cheapest. Material costs are high, but you can always find an inexpensive alternative to this. From our article you will learn how to make a wig inexpensively.
Wig Materials
To make a wig, you will need the following materials:
- silk ribbon or piece of curtain fabric;
- thread and needle;
- bag or cling film;
- scissors;
- pencil;
- brush;
- PVA glue;
- cotton fabric.
A meter of tresses for doll wigs costs from 150 rubles. If you have a Barbie-sized doll, then this is not a problem. But if your doll is more than 70 cm tall and the toy’s head is large, you will need a lot of curls, which means there will be serious costs.
Instead, you can use a ribbon - unravel it and straighten it, or carefully curl the threads, then you will get beautiful strands. In addition, you can unravel the fabric of the curtains. It is shiny and smooth, making the wig beautiful.
There are many options for making a wig for a doll at home without breaking the bank. In this article they will be used. They are woven from smooth threads, and unraveling them is simple and quick.
Preparing for work
Wrap the top of the doll or bag. It is better to use film, as it will fit tightly and will not slip. Try to pull it properly over your head so that there are no folds left.

Have a bowl or bucket of water ready to wash off the glue from your brush and hands. When creating a wig, your hands must be clean at every stage. This is painstaking work. Any negligence can affect the quality of the wig and its appearance. How to make a wig is easy to understand, the main thing is to learn how to make it carefully.
Making a wig cap
Apply glue to the head with a brush.

Wrap it with scraps of fabric in a circle. Press the edges together.

Place another piece of fabric on top, cut its edges so that it is convenient to press them to your head.

After you have pressed the pieces of fabric well onto the doll's head, make sure that they will not bristle or peel off. Now wait for it to dry.

After the hat has dried, draw an outline of its edges with a pencil and cut it out. The contour should pass above the forehead, above the ears and be slightly above the neck. You can see what should happen in the end in the photo in the article.

Preparation of strands (tresses)
Now start unraveling the material you are using into strings and curls. A tip on how to make a wig without causing any inconvenience: use a large, strong needle or a small hook.

After the strands have been untangled, you need to start connecting them into a tress. Just take one long thread and start tying strands to it.

Comb the tresses with a wide-toothed comb. If it is difficult to comb, wet your hair with water and even apply conditioner.

Straighten the strands using a regular iron, but it is more convenient to do this with a curling iron, and the quality will be better. And if you want to curl them, then wet them, wrap them around the handle shaft and run an iron or curling iron over them, or place them near the radiator and wait until dry. However, the temperature from a curling iron or iron will be more effective.
Sewing tresses to a hat
Strands can also be attached using glue. But if you are not confident in your accuracy, it is better not to use it, otherwise all the strands will be stained with it, and it will be almost impossible to clean them. In addition, preparing tresses is the most painstaking work. It will be a shame if everything goes down the drain.
Mark circles on the cap with a pencil, focusing on which you will attach the strands. Be sure to do this if this is your first time. Otherwise, it will turn out crooked, and you will not understand whether it is possible to fix it and how. Making a wig is not so easy in reality, but the process is easy to remember.

Secure a knot of thread at one of the edges of the hat at the front. Make sure the knot is strong enough. Start sewing one weft in a circle until you reach the opposite edge. Do not make the thread too long so that it is enough for the entire stage of work. In any case, it will get tangled in your hair during the process. Unnecessary nodules will appear. Many doll makers note that making doll wigs requires a lot of patience and great care.

Here the cap is completely trimmed with strands. But you haven't fully learned how to make a wig yet. At this stage he does not look attractive enough, and there is no parting.

Take another piece of tress. The thread to which the strands were attached will become the parting. Place it on the toy’s head the way you like and sew it on. Guide the needle exactly along the parting. Better make spot seams.
At the end of the work, trim your hair. If they stick out, moisten them and press them down with cling film and rubber bands and leave overnight. After this they will be more obedient.

If you want to make a wig of an unusual shape, it is better to prepare a sketch in advance and think through the process of work. It will not be possible to make an unusual wig from the material suggested in this article, especially if it is small. Therefore, make braids, buns, and jewelry separately and glue or sew them to the wig. It's best not to use hot glue, as it creates strings that can get stuck in the strands. It will be extremely difficult to clean this without damaging the wig.
Making wigs with your own hands is quite a painstaking task that requires a lot of patience. But it’s worth it, and the result lives up to all expectations - it turns out to be a wonderful wig.
But how to make a wig with your own hands? To make a wig, you need a mesh cap for the base, acrylic threads or artificial hair. The cap - the base - is prepared in advance from a nylon mesh or, if it is not at hand, you should use the same threads from which the hair will be made. For ease of work, the cap is placed on some round object that follows the shape of the head. You can also attach the base of the cap with a thin elastic band so that it fits tightly on your head.
Making a wig from hair, whether natural or synthetic, is quite expensive, so for those looking for a more affordable option, acrylic or simple linen threads are suitable, which must be unraveled and dyed in advance in the desired color. In both cases, the work is carried out using the same technology.
You need to decide how long the curls on the finished wig should be. The prepared threads should be doubled longer hair wig, since they fold in half during operation.
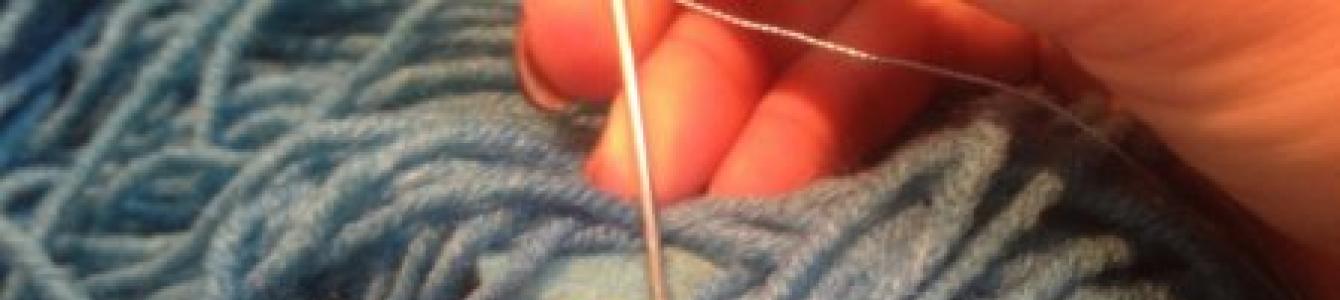
When all the preliminary work is done, the decisive stage of making a wig remains - tying the hair to the base mesh. So how do you sew hair onto a wig? It is more convenient to start work from the top of the head. A piece of thread folded in half is taken, a loop is passed through the hole in the mesh, and at the end the free end of the thread is passed through the fold at its base. This work can be done by hand or using a hook. This technique repeats the fringe manufacturing technology. Thus, each piece of hair or thread is sewn on.
As you work, you need to remember the desired volume of the finished product. If you tie the threads through each hole in the mesh, you will get a fairly thick wig. The bangs are made from threads that are knitted at the base of the mesh. In order to get a parting, two threads are tied in the required row through the mesh holes, which are then distributed on opposite sides of the wig. This gives the parting a natural look. This work continues until the finished product is received.
If the end result should be a carnival wig, then you can use tufts of artificial hair, which are fixed to the base of the wig with strong glue. The question may also arise about how to sew a wig with a bald head. To make a wig with a bald head, use any rubber base, a swimming pool cap will do. This base is stitched with large stitches to the level of hair growth, then the work is carried out using the same technology, with the only difference being that the threads are knitted through the stitches.
After the wig is ready, the final touch in working on it is choosing the desired hairstyle. Attached hair allows you to perform any actions on yourself - cut, dye, braid.
A wig made step by step with your own hands will be useful for children's matinees or for those people who take part in theatrical productions. You can make such a wig from the most different materials, and our master class will help with this.
Making a simple wig with your own hands in a step-by-step master class
To make a judge's wig from padding polyester as in the photo above, we will need:
- Sintepon
- Thread and needle
- Cap
- Black bow
Before you can make a wig quickly and efficiently with your own hands, you need to work on the cap. In order to be able to attach padding polyester to it, you need to cut off the visor, and if there are logos or bright inscriptions on the cap, it is better to disguise them with gauze or cut them off, otherwise they will show through the padding polyester. The best way to make a judge's wig is from a white cap.
When the cap is prepared, you can start shaping the wig. To do this, a square with a side of 60 cm is cut out of padding polyester. Markings should be made on the padding polyester along which the wig will be cut.

Having made markings under the forehead as in the picture above, you can cut off the excess parts from the padding polyester.
Now the resulting pattern can be attached to the cap and basted with thread. It is better if the forehead and back of the wig coincide with the forehead and back of the baseball cap. This is what the future wig looks like at this stage.
To make the wig look like the judge's hairstyle, you need to make 6 padding polyester rollers and secure them with threads. To make the rollers hold their shape better, you can insert paper tubes inside them. As in the case of a cap, the paper should be white so that a spot of a different color does not show through the padding polyester.
Each padding roller is sewn to the wig separately. When all the padding polyester parts are sewn, you can cut off the excess material.

The front of the judge's wig is ready. Next you need to work on the back of the head. On the back of the wig, several more padding polyester rollers are made, longer and larger than those on the face. Three or four pieces are enough. First, the padding polyester rolls are tied with thread and then decorated with a black bow. The wig is ready!
Making a bright wig from threads for a girl with your own hands
A bright thread wig for girls will be useful for school party or skits. In addition, an unusual thing cannot but delight a child.

- Thick threads for knitting in the desired color and length
- Felt pieces 25 cm long, 5 cm wide
- Threads
- Crest
- Scissors
The prepared knitting threads should be folded in half. Next, they need to be sewn with small stitches to the felt, as shown in the photo below. Small sections of thread should be sewn to the felt until they reach the edge. After this, the strip of felt must be turned over, and a comb must be sewn to the inside of the future wig.
After this, the ends of the wig can be trimmed and the resulting product can be tried on.

You can also sew bangs to the wig if your hairstyle requires it. You need to fold the threads in half and sew them to the front of the wig. Next, the desired length is formed with scissors.
Let's look at another simple version of a paper wig
A wig for children is made from paper very quickly. In our case it is multi-colored corrugated paper, cut into strips. The basis on which the paper strands will be attached will be a frame made of strips of thick paper or cardboard. It is better if it is cardboard, because it is stronger and more reliable. It is also desirable that it matches the main color of the wig.
So, making a wig begins by measuring the circumference of the child’s head. A size equal to this circle is cut from the cardboard. The width of the strip should be approximately 4-6 cm. If the length of the sheet in a set of cardboard is too short, the strip will have to be glued.
When a strip equal to the circumference of the head is cut, you need to find out the distance from ear to ear and cut another strip with the same length. You will need to glue a couple more of these strips to the base. And to make the wig secure, you can add criss-cross stripes.
The result is a kind of frame on which the paper hair will be attached.

Now that the frame is ready, you can start working on the hair. These can be strands of the same or different colors, different haircuts and hairstyles. From corrugated or ordinary colored paper, you need to cut strips of the required length and place them in rows on the frame. Wigs look better where the hair is as thick as possible.
If you want the hair on your wig to be curly, you can curl it using a regular pencil. To create unusual hair, a lightweight cassette film is suitable. It not only shines, but also flutters when moving, which will certainly delight the child.
Glued-on hair can be braided, some strands can be decorated with sequins, bows or large hairpins. If the wig requires bangs, then in the forehead area you need to attach another strip to the frame, onto which the bangs will be attached.
Video selection on the topic of the article
And the videos on the topic below will help you find new ideas for creating a wig for a child.
In the history of fashion, wigs appeared with the emergence of civilization. They were used by the beauties of the ancient Egyptian state and Babylon. However, only representatives of the authorities could wear it, emphasizing their authority and strength. Today, the wig is widely available. For a fairly affordable price, you can purchase it at any professional hair store or make it yourself at home.


Required tools and materials
Before any task, it is advisable to prepare everything in advance necessary tools and materials, which will not only optimize the work, but also eliminate unnecessary worries associated with finding the necessary item. So for self-made To wear a wig, you will need to acquire the following items, many of which can be found at home:
- tape measure;
- mannequin head;
- cotton ribbons;
- carnations;
- hammer;
- a mesh cap specially designed for making a wig, or a cotton lace fabric;
- sewing needles;
- a thread that perfectly matches the hair color of the future wig;
- safety pins;
- scissors;
- artificial or natural hair;
- metal comb for combing hair;
- a special hook for fixing hair to the base of the wig;
- steel springs;
- comb.


Manufacturing technology
Making a wig yourself that will be suitable for daily wear is a rather labor-intensive process that can take several hours, so not everyone decides to take on this task. But for those who decide to make a wig at home, you will need to be patient and acquire the required tools. The technology for making a wig includes several stages.
Head freeze
First, you will need to take a measurement of the coverage of the scalp near the hairline. It is recommended to use a measuring tape. If it is not available, you can use a regular lace or rope. Having measured the circumference of your head, attach the lace to the ruler and determine the value of this indicator.
It is necessary to measure strictly along the base of the hairline, passing through the uppermost cervical vertebra and the top point of the hairline on the surface of the forehead. The measuring tape should not be pinched when taking measurements. Make sure it goes straight over your ears and is not too tight.
The next measurement you need to take is the center of the top of your head. To do this, place the beginning of the measuring tape at the center of the top point of the forehead and stretch the tape through the crown to the bottom point of the beginning of hair growth on the neck.
The measuring tape should not be too tight or too loose, otherwise the measurements taken will not be entirely accurate.
The final measurement for creating a wig will be the distance between the ears. To do this, stretch a measuring tape from one ear to the other. An important condition is the top point of the crown, through which the tape must pass. The measuring tape should start and end at the point where the arms of your sunglasses would normally go.

Creating a Model
The next stage will require the presence of an item such as a head mannequin. Working with him will become much more comfortable and easier. So, first you need to transfer the taken measurements to the head dummy. To do this, based on the obtained indicators, a model of the head for the future wig is drawn. In addition, you will need a lace or mesh cotton cap. It should fit snugly on the head without pinching the skin too much. Place the mesh wig cap on the mannequin.
Having placed cotton strips around the perimeter of the previously drawn model, they are driven using small nails directly into the mannequin. If a foam analogue is used instead of a mannequin, then the nails are replaced with ordinary safety pins. It is necessary to ensure that the cotton ribbons are evenly fixed. To sew lace ribbons to a previously attached cotton ribbon, they are generously moistened using a spray bottle, which will significantly speed up the process.
It is worth mentioning that the length of the lace ribbon is not equal to the circumference of the head, it should be a little longer. It is recommended to use as many ribbons as possible.


To prevent the ribbons from skewing, it is advisable to first secure them with safety pins to the cotton ribbon. Although sewing stores offer a wide range of lace in different colors and shapes, it is recommended not to purchase lace ribbons with an embroidered pattern. It is necessary to moisturize them so that they become more elastic and can take the required shape. Next, you need to try on the resulting wig base. After removing the studs from the mannequin and the cotton ribbon, it is recommended to immediately try on the hat.
A well-made cap should fit snugly on the head, but not discomfort and discomfort. If the foundation has any shortcomings, find out what they are and eliminate them. Return the mesh cap to the mannequin, fix it according to the made layout and correct the shortcomings. If the base fits perfectly, you need to cut off the excess part of the lace hanging from the ribbon edges.


Hair selection
At this stage, you need to decide what kind of hair you will have to work with - artificial or natural. Each option has its own disadvantages and advantages. If the wig is made for daily wear, then the choice should definitely fall on real natural hair. They look natural and last longer. In addition, they are more comfortable to wear on a hot sunny day and easier to style using special products.
However, such hair requires more careful attitude. Regular exposure to the sun will cause the color to fade over time, and the hair will inevitably become prone to split ends.


Non-natural hair is perfect for a wig worn exclusively on holidays or special occasions. special occasions. They do not require regular styling, and the color is not subject to fading. But you can’t dye artificial hair, and in the sun it’s better to stay at home. Having decided on your hair, regardless of its origin, it is recommended to comb it thoroughly. Then tighten them with tight elastic bands into several bunches.


Making a wig
The most difficult part of making a wig at home is the final stage. You will need to choose the right ventilated hook. The correctness of its choice depends on how much hair will be placed in one strand. In other words, a very thick strand of hair will require the largest hook and vice versa. If the lace base of the cap has small holes, it is advisable to give preference to a small hook.
A thick bun of hair will give the wig fullness.
Making a wig involves pulling strands of hair one by one through loops and fixing them on a lace base. The hair must be secured to a single or double knot for each hole of the mesh cap using a hook. It is recommended to start fixing hair from the neck. Starting from the bottom of the head to the top through sides. The last place of fixation should be the top of the head.


