 Mandalas are schematic designs often used by Easterners, particularly in Hinduism and Buddhism. With their help, people passed information from generation to generation. Wisdom, knowledge, history, traditions - all this was encrypted with the help of alternating colors and weaving elements.
 The Indian mandala is a kind of Amulet; it helps not only to understand oneself, but also to find ways to solve important life problems. Mandala weaving similar to meditation - this activity calms you down, puts your thoughts in order and helps you achieve inner harmony. Decorative mandalas fascinate with the play of color and their uniqueness. They are a reflection of the creator’s inner world at the time of their weaving. And what colors you choose for your mandala will depend on your inner state.
Weaving a mandala with your own hands - master class
In order to weave a decorative Indian mandala, you need:
Several balls of thread (we select colors that match each other);
- scissors;
- what we will use to weave mandalas - these can be barbecue skewers, fireplace matches or even toothpicks. In total you will need 4 pieces.

Mandala weaving process:
Preparatory stage. We take two sticks, fold them and tie them.

We arrange the sticks so that they form a cross.

We tie the middle crosswise several times.

First stage mandala weaving. You need to wrap each stick. We put the thread on top of the stick, make a turn around the stick and move on to the next one, repeating the same thing. When we finish the central square, tie the thread and cut it. We tie the next color and continue weaving.

Take the next 2 sticks and do the same. You will get 2 squares. The second one can be made one color and a little larger than the first.

The second stage is the socket. This is the most difficult stage in weaving a mandala.
Let's put our parts together like this:

We tie the next thread to the stick of the lower cross. And we begin to weave rays. They trudge through two to a third. That is, we put the thread on the stick, make a turn, lower the thread under the mandala, skip 2 sticks, put the thread on top of the third stick, braid it, and so on in a circle. We weave several circles, returning to the stick with which we started. We tie the strings and tie the next color.

In the same way, after two to a third, we braid several circles with the next color.
You can weave the rays in another color. Now we straighten the socket. We distribute the sticks evenly, adjust the threads and proceed to the next stage.

The third stage of weaving a mandala - squares. We weave them through one axial stick. We start from the bottom square.

Weave a square of arbitrary width. The thread was cut and tied to a stick.

Weave the next square. Now on the upper cross.

Take the next color and in the same way weave first the lower square, then the upper one. The weaving principle is still the same.


From the inside it will look something like this:
The homeland of Indian Mandalas is Central and South America. They were woven by the Huichol Indians. Other names for the Indian Mandala are Ojo de Dio - “God's Eye”, and in the Huichol language the word Sikuli was used - “The power to see what is hidden” or, in another word, clairvoyance.
The master class given in this article will allow you to understand exactly how you can weave an Indian Mandala... Of course, it is worth considering that in order to weave a truly energetically strong Mandala, you need to know the traditions of Indian tribes and understand the images.
Indian mandalas are gaining more and more popularity in the CIS, and first of all, in my opinion, thanks to the amazing person Anna Fenina. Thanks to Anya, a master class on making decorative Indian Mandala.
STEP 1
We will need scissors, natural threads (preferably), wooden sticks (these could be Chinese sticks, wooden skewers, etc.). In my case, I took toothpicks - because I decided to weave a very small mandala from thin two-color threads.

STEP 2
Tie two sticks together in the middle, leaving a small loose end of the thread.

STEP 3
Unfold the sticks to form a cross.

STEP 4
Fix the position of the sticks by weaving diagonally, first on one side and then on the other. To hide the free end of the thread, start it first and secure it with the main thread.

STEP 5
Carefully ensuring that the sticks are at right angles to each other, we begin to weave a “square”, wrapping the thread sequentially around each stick, exactly as shown in the photo.


STEP 6
The square can be made of any size you need and use several colored threads at your discretion, since I took two-color threads, my square now has a frame white. You need to finish weaving on the same stick with which you started weaving, securing the thread with one knot.

STEP 7
Now let's repeat the previous steps with the remaining pair of sticks. As a result, we will have two similar crosses, from which we will make our mandala. The squares can be the same size, or the bottom one is slightly larger than the top one, choose the thread colors arbitrarily

STEP 8
This stage is the most important - we have to fasten two wooden bases, making sure that the sticks are exactly in all planes, forming an eight-pointed star. Fasten the thread to the lower wooden cross.

STEP 9
Using rosette weaving, we fasten two crosses together. This stage requires some skill; you need to constantly ensure that the sticks are positioned correctly in all planes. Depends on the accuracy and rigidity of the weaving general form and the strength of our future mandala. The “rosette” is woven through two sticks, braiding every third one as shown in the photo.

STEP 10
When weaving a “rosette” you can use various multi-colored threads; in my case, two-color threads make the weaving process easier and give a beautiful “multi-colored” look. Having finished weaving the “rosette”, we fasten double knot thread with a free end of the thread. The most difficult stage is over :)

STEP 11
You can move on to the relaxed part of the weave - squares. We weave them through one stick, weaving a square first on the lower cross, and then on the upper one.

STEP 12
As a result, we will get two squares - one at the bottom, the other at the top. We secure the threads, as in previous times, with knots with free ends.

STEP 13
Well, it’s time to turn on your imagination and, using two weaves “rosette” and “square” and multi-colored threads, weave your own unique mandala pattern. One has only to take into account the fact that you need to leave about a quarter of the length of the sticks for the final weaving. I took some more green thread and repeated the rosette weaving. After which she began the final weaving of the “belt” - when each stick is braided in a circle in turn.
Today you will learn how to make a mandala from threads with your own hands. We will weave a mandala with 8 rays called “Pansies”.
For the weaving process we only need straight sticks, sharp scissors and threads.

Take two sticks and tightly wind them together with a thread exactly in the middle.

Turn both sticks exactly at right angles. You will see that the thread winding lies along the same diagonal between the sticks. Without cutting the thread, wrap the cross along the second diagonal.

Now there is an even cross in front of you.

We weave the first square The thread lies on top of the stick, makes a full turn around it and goes to the next stick.

If you wrap the stick not once, but twice, you will get a clearer and more even pattern. Remember to keep the thread tight and place the rows of threads tightly together.
After going through all the sticks in a circle, you will notice that you have a square of threads. Continue weaving, going round and round all the sticks. Don't forget that the thread goes on TOP. As a result, you will get a square.

This is what it should look like from the back.

The thread needs to be cut, leaving a rather long “tail” and tied around the stick where the weaving stopped.
Take the two remaining sticks, a thread of a different color and repeat the entire sequence of actions on them to obtain the second square.

Now decide which square will be on top of your mandala and which will be on the bottom. Place the woven squares on top of each other so that the squares are right sides up. Tie the thread with a double knot to any of the lower sticks.

Let's start the connection. Hold the crosses very tightly. The thread passes UNDER the mandala. You need to braid every third stick. Pass two sticks, wrap the third and again take the thread under the mandala.

Wrap every third stick in this manner until you have braided all the sticks. All the “tails” that you have left on the squares need to be run under the braid. On the reverse side you should get a “star”.

Continue weaving the star until “rays” grow on your mandala and the upper and lower crosses are securely fastened together.
Tie a thread of a different color to any of the sticks and continue weaving the “Star” element.

The next pattern is called "Square". Tie a thread of any color to any of the sticks of the upper cross. Begin to braid the sticks one by one, passing the thread under the mandala.

As a result, you should end up with a square on the top sticks.

Count the number of rows you will make.
Now we will weave the bottom square. We tie a thread of a different color to any of the sticks of the lower cross and begin to weave the sticks through one, passing the thread from the bottom of the mandala. Go the same number of rows as you did on the top square.

Don’t forget to pull the thread well and lay the rows as tightly as possible. As a result, you should end up with a square on the bottom sticks.

We continue to alternate the upper and lower squares using threads of different colors.


In the end you will succeed very beautiful pattern from intertwining squares.

We weave the "Belt" element. Tie a thread to any of the sticks. Begin to braid each mandala stick sequentially.

You should now have a circle.

Cut and tie the thread.
Now tie the thread again to any of the sticks and repeat the “Star” element.

Sequentially braid every third stick, passing the thread under the mandala.

View from the back.

Continue building up the rays of the star, changing colors.

Cut and tie the thread.
Let's add a decorative element - a banner. Tie the thread to any of the sticks, weave 5 rows of the belt, then unwind the thread longer and cut it.

Hook the thread into the “belt” of the mandala

and make a loop by tightening both belts as shown in the photo.

You will get a beautiful “petal”. Walk in a circle in this way, tying both belts together with a thread. This is what the result will be:

Tie a thread to one of the sticks and weave a belt, not reaching the ends of the mandala.

Now change the thread, tie it and start braiding the ends from the bottom up and back.

Once all ends have been braided, tie and cut the thread. Coat all ends with PVA glue and let it dry. Then you can trim the last “tail” of the thread.
Mandala “Pansies” is ready!

Did you like the master class? Save it for yourself:
Other master classes
 .
.
 .
.
I have long wanted to learn how to weave a mandala. And then I found a detailed and very accessible master class in photographs. Now I’m definitely going to weave something similar for myself))))
I invite you to entertaining lesson making Indian mandalas Ojos de Dios. We will try to make a DECORATIVE eight-rayed Indian mandala from wool and wooden sticks. Make yourself comfortable, turn off the TV and radio and stock up on the necessary things: balls of thread, four sticks (I took sticks 25 cm long and 6 mm in diameter), scissors. We won't need anything else.

Place two sticks together and tie them tightly in the middle with a double knot. We leave a small tail, which will go under the braid during work.

Let's unfold the sticks so that they form a straight cross. Be careful to ensure that the angle between the sticks remains 90 degrees during the weaving process. We secure the sticks by tightly wrapping them 6-7 times diagonally, first along one diagonal, then along the second. Check that the cross is strong and the sticks do not wobble.

Now we begin to braid each stick with thread in a circle. Throwing the thread on top, we make a full turn around the stick, and when the thread is on top again, we throw it onto the next stick. Don't forget about even tension. Weave until you see it forms a square. Make it whatever size you want

When you decide that the size of the square is sufficient, cut the thread with a small margin and tie it around the stick with which you started weaving the square with a regular single knot. On wooden sticks, even a single knot holds quite tightly.


When you finish weaving with the second color, secure the thread. The simplest thing is to tie it with the rest of the ponytail with a double knot. However, complex mandalas, for example, figurative or healing ones, are generally woven with just one knot - and that one at the end. And not a drop of glue!

And then we will weave the same square on the two remaining sticks. One color is enough here: it will be barely noticeable in the mandala. The size should be exactly the same as the size of the first square, or a few millimeters larger than it.

The first step has been taken. Ahead is the most difficult part: the socket. A rosette is a small sun, which is obtained at the very beginning of weaving a mandala, and its strength and quality depend on its quality.
Place the two squares on top of each other, distribute the sticks evenly, and tie a string to one of the sticks of the bottom square.

We begin to braid the sticks with threads EVERY TWO. That is, the thread passes under the mandala, grabs a stick TWO from the previous one, makes a turn, and again goes under the mandala to the next stick through TWO. At first, the mandala may not obey and “walk.” Your task is to make one full circle, return to where you started, and then correct the squares relative to each other in all planes. Make as many circles as you want, but do not forget to adjust the sticks relative to each other in all planes while weaving.

Tie the next color to the stick and start weaving with it.

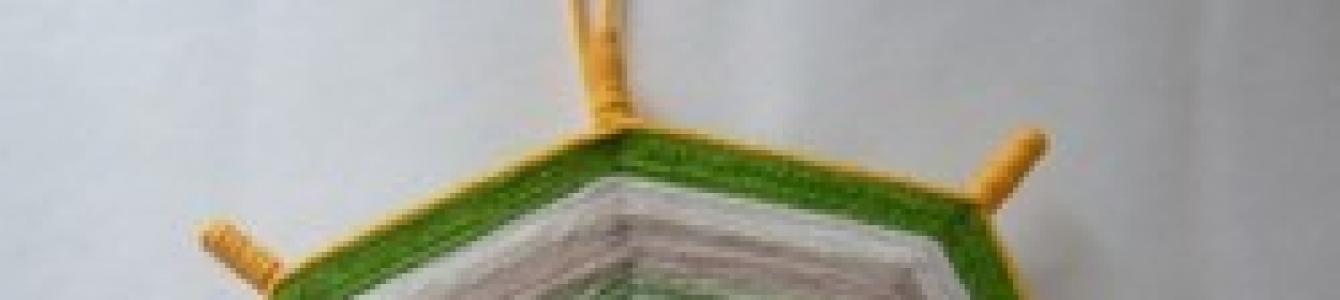
From the inside out it will look like this. After finishing the dark green, I wove a few more rows of light green. You can use as many colors as you like.

We have a rosette ready - the most difficult thing in the whole mandala. Now let's move on to the relaxed part of the weave - the squares. The squares weave, almost like rays, only THROUGH ONE stick. It turns out that we are weaving a square either on the upper cross or on the lower one, as at the very beginning. Tie a thread of a new color to one of the sticks of the bottom square and start weaving through one stick. Having finished the color, secure the thread with a knot.

Let's add a couple more squares of a different color. I decided to go with purple, but you can add more colors.

Now let's weave the rays again for a change. They are made in the same way using two sticks, as in the beginning in a socket.

Add as many more flowers as you see fit, but be sure to leave at least one quarter of the sticks to weave on them the final element of the mandala - the belt.

Let's start weaving the belt. We tie a thread to any stick and begin to weave the sticks sequentially in a circle. This is perhaps the simplest of the mandala patterns.

Once you finish one color, move on to the next. After a few rows of light green, I added one row of blue and finished off the waistband with dark green.


Well, the very last securing pattern. We were left with unbraided ends of the sticks about a centimeter long. Tie a thread to one of the sticks, which will be the final color chord in the mandala.

This will be a kind of belt in one row. Throw the thread onto the next stick and wrap it to the end, to the top, and then wrap it again to the bottom and throw the thread further.

Having gone around the circle completely and wrapped the ends of the sticks, tie a thread with a tail of the same color and make a loop from the tails.
You can achieve your goal in different ways, the main thing is not to sit still with your hands folded. In any case, you will have to make decisions, act and take responsibility. And in free time pay attention to weaving a mandala from threads. Take yours beautiful hands with such creativity, you will get closer to your dream faster if you tune in correctly to the process, because thoughts are material.
Mandalas were born in Eastern culture as a magical symbol that helps achieve desires and protect against negative energy. Initially, they were created on sand, but now it is customary to transfer images to paper or weave them from threads.

It is believed that the symbolic pattern, combined with guided meditation and visualization of desire, helps achieve the goal. In addition, this item can become an original element of room decor and bring a lot of pleasure and creative expression in the process of its making.
Interesting! Eastern teachings say that the mandala is a model of the universe. It has all the elements and natural elements. This strong amulet for a person. Contemplation of magnificent patterns sets you up for a positive train of thought and allows you to grow spiritually .
How to weave a mandala from threads?
For weaving you will need:
- Four wooden sticks. The diameter of the finished product depends on the length. For convenience, a depression is made exactly in the middle of one of the sticks. By combining the centers, a reliable design in the form of a cross is obtained;
- Colored wool threads. Natural material is more convenient to use because it does not slip;
- Scissors;
- Glue.

Choosing the color of threads for a woven mandala
The colors that are chosen for the threads are matter:
1. Yellow And orange protects from evil and negativity, improves physical and emotional well-being;
2. Green has a positive effect on material wealth, professional growth and health;
3. Blue promotes calm and relaxation;
4. Blue has a beneficial effect on mental processes;
5. Red charges with confidence and strength, fights loss of strength;
6. White increases intellectual abilities;
7. Violet reveals creativity and intuition;

Mandala weaving pattern
Braided mandala made from yarn and wooden sticks (you can use barbecue sticks or disposable chopsticks) starting from the center and working your way around:

Technique for weaving mandalas from toothpicks
The word refers to the classical Indian language meaning "circle". It represents wholeness, a cosmic diagram that reminds us of our relationship to the infinite. When used in crafts, Mandala designs include layers of circles, and the number of layers depends on your preference. Here good lesson Russian stylist Natalya Semenova on how to weave a Mandala brooch using ordinary wooden toothpicks as a base.

This is a creative and easy way to make a beautiful Mandala brooch! By developing this idea, you can also make pendants, earrings and other accessories. Enjoy!
Step-by-step weaving of a mandala
Let's analyze one of the magical patterns "Pansies"
Step 1. We weave the warp
Rewind two sticks parallel to each other exactly in the middle with yellow thread:

Unfold at right angles to form a cross. Wrap it diagonally:

Step 2. First and second square
The yellow thread must be placed on top of the stick, make a full turn and go to the second one. An even pattern is achieved by wrapping it twice:


Important! It is good to stretch the threads and make the rows tight. Repeated wrapping results in the first square;
Cut the thread and leave a long tail. Be sure to wrap it around the stick on which weaving has stopped:

Take two more sticks and a purple thread. We repeat the previous steps again;

Step 3. Star
After the second square is ready, decide which one will go on top. Then we connect the structure. Place the squares on top of each other so that the front sides face the same direction. We tie it with a double knot, attach the thread to one of the lower sticks and connect it under the product, braiding every third stick;

On the wrong side you should get a star-shaped figure, and “rays” should appear at the ends. In this case, the upper and lower crosses are securely fastened:

Give free rein to your imagination and weave threads of other shades at this stage. Shades of purple will look more natural, and contrasting colors will look more exotic and original.

Step 4. Big square
We tie a thread of any color of your choice to any of the sticks of the upper small cross:

We braid sequentially through one. The thread should go under the structure. On the upper sticks a large square appears, which runs parallel and perpendicular to the small ones:

Count the number of rows you will make.
Step 5. Large bottom square
It should go along the bottom, perpendicular to the previous element. It is better to choose a thread of a bright, contrasting color or use a yellow initial one. We attach a thread to the stick of the lower cross and weave it through one at the bottom:

We make the same number of rows as in the large upper square
Alternate steps 4 and 5 until the end of weaving:


Step 6. Belt, star, petal
We attach the thread to any stick and weave it consistently in a circle, without skipping. We make several rows at our discretion:


We repeat the “Star” element, with increasing rays of different colors or shades:


Trim and secure the ends.
Now we tie a thread to any stick and make a “belt” again, but it should be slightly narrower than the first. We connect the belts with a loop and get a petal. In this way we go through the entire pattern:


Step 7 Edging
This is the final element. We make another belt with a contrasting thread and braid the protruding ends of the sticks from bottom to top:

We cut the threads and coat the ends with PVA glue. Ready!
How to charge a mandala that you created yourself?
The mandala automatically “adopts” the emotional mood of its owner and is charged with his energy.
That is why the creation process requires privacy and tranquility.
Important! It's better to get down to business at a time when nothing distracts you. This is the only way to immerse yourself in the process, tune in and convey the desired message.
DIY mandalas (video)
In the process of creating a mandala with your own hands as a personal amulet, a person finds his “I”, perhaps discovering hidden potentials and desires. Looking at the finished mandala, you can understand a lot about a person, because in any creative product we reflect ourselves.
Master class on weaving mandala Ojo de Dios
These mandala weaves are called Ojo de Dios, translated from Spanish as “God’s eye.” For a long time, the Mexican tribe wove such mandalas as amulets for the home. They also used them as writing, weaving entire stories into a mandala and sending them to the neighboring village so that others could then read the encrypted message.
The video master class describes in detail how to weave the “God’s Eye” mandala
Read the article: 15 931


