What to do if you are tired of decorating a room, but there is no money or energy for repairs? The fastest and least expensive way is to change textiles and decorative elements. Moreover, not all decor needs to be purchased. For example, decorative butterflies will help add an element of lightness. They are used to make panels and wall compositions. Larger and brighter ones “live” on curtains or flowers.
What are they made from?
Butterflies on walls are made from different materials, sometimes even exotic. The spring appearance of the resulting decor depends on this choice. While you have no experience and you don’t really imagine the end result, you can make several different decorative butterflies for testing. They can be attached to the location of the planned decor. This will make it easier to evaluate the effect and choose the most suitable option.
Paper
Butterflies for decoration from paper are the easiest and cheapest to make. There are several different techniques. If the product is flat and is glued entirely to the wall/panel, only the front surface is important. If it is expected volumetric composition, the paper must be double-sided - both sides must be colored, because the white “wrong side” often spoils the impression.

Instead of regular colored paper, you can use corrugated paper. The effect will be different - it is lighter, airier, translucent, with its help it is easy to make the decor with butterflies three-dimensional.

Butterflies for decoration from corrugated paper turns out airy and light
You can make butterflies from an old magazine, newspaper, postcards, colored napkins, wallpaper suitable colors, any other printed products.

As you can see, there are a lot of options just from paper. If you consider that they can still be slightly tinted, combined, made multi-layered, it is clear that there is huge scope for imagination...
Cardboard
Cardboard is not very dense. It's more like a very thick paper. It is also colored and double-sided. It is often used to create voluminous decor - you can easily bend the wings relative to the body. This material even holds its shape better. Just remember that you can’t make corrugated wings - the material is too hard to make a small fold.

It is also easier to make openwork butterflies from cardboard. Having a sufficiently sharp knife, cut out the “extra” leaving only the partitions. Such decorations require perseverance, great patience and accuracy.

Cardboard is also used to make templates for “mass” production of identical butterflies. With the help of such stencils you can make insects of the same type and size and spend a minimum of time on it.
Textile
Having a template, you can make butterflies for wall decoration or a fabric chandelier lampshade. The fabric will need to be given additional rigidity, but otherwise the process is not much different: the outline is applied, cut out, decorated if necessary, and mounted on the wall.

It is more difficult to work with fabric, although very interesting decorative crafts are obtained. This is an option for more advanced decorators and needlework skills or sewing machine. With their help you can recreate the veins on the wings.
Exotic materials
Old vinyl records will also be an excellent raw material for making butterfly decor. Since vinyl is hard, you will have to heat it in the oven to cut a butterfly out of it. And in order not to spoil the baking sheet, you need to cover it with foil.

An outline is applied to the vinyl using chalk, the record is placed in a preheated oven, as soon as it begins to soften, it is taken out and quickly cut along the outline with scissors. Often the “workpiece” has to be heated several times. After cutting, heat it one last time and give it the desired shape.
Beer cans or any other relatively soft sheet metal also make excellent flying beauties. First you need to cut off the bottom and lid and level the piece of tin. Then, using an awl, transfer the contours from the template to the sheet metal, connect them with a marker and cut along the resulting contour.

Even beer cans can be used for “butterfly” wall decor.
You can decorate the back - the shiny part. To do this, you will need markers or felt-tip pens; you can try decorating with nail polish. The painted beauties are given the desired shape. One caveat: the edges are very sharp, you need to work carefully, otherwise cuts cannot be avoided.
How to make outline butterflies from paper
Let's start with the simplest, but most effective - contour butterflies. You will need colored paper or magazine pages, outline maps, etc. You can use old postcards or colored cardboard. You will also need regular cardboard to cut out the template.

These are contour butterflies for decoration - they are easy to make and look great
Preparing the template
We take a piece of cardboard - any kind, you can even use some kind of packaging (tea, breakfast cereals, cereals, etc.) the main thing is that the cardboard is dense and not porous. Find a butterfly silhouette that you like, transfer it to cardboard and cut it out. There are several silhouettes in the photo gallery. They can be printed, then cut out and transferred to cardboard.
A butterfly on the wall - it would be nice in color. The swallowtail is attractive with its “tail,” but the paper consumption is greater and the work requires more accuracy. Paper butterfly templates for interior decoration are made in half. The second is obtained “automatically” after unfolding a piece of paper folded in half
Some tips for working with templates. Many butterfly contours are given with two wings, but it is better to cut off one wing - you will definitely get it symmetrically.
Decorations made from winged insects of different sizes look good. Therefore, the same contour can be enlarged or reduced using the simplest functions of graphic editors - the same Paint, which is available on any computer. Since in this case only the outline is important, the quality of the drawing is not so important, so feel free to experiment with sizes. We cut out the printed template, apply it to cardboard and trace it. We cut it out and get a hard working template with which you can make dozens of identical elements.
Cut and attach

Take a sheet of paper, fold it in half, attach a template, and trace it. Cut along the drawn line. Next, we bend the wings away from the “body” and get a workpiece. Having cut out a certain number of butterflies, we attach them to the chosen place - on the wall, a piece of cardboard, etc.
You can attach it with regular glue (PVA usually the best option), small strips of double-sided glue. You can use wallpaper glue, etc. If you are in doubt about the result, stock up on sewing pins. They can be mounted on the wall several times without much risk of damaging the surface. When you have placed all the butterflies and you are satisfied with the result, you can glue or use tape.
Openwork
The situation is a little more complicated with openwork butterflies. They are made from paper or cardboard. It is important to have a good sharp knife and a template with lines marked on it along which you will need to cut out the excess paper. It’s worth saying right away that this is painstaking work.
Patterns of butterflies with openwork wings - a variant of medium complexity The second half is symmetrical
The process is the same as described above: prepare a template, then cut out the required number of elements from it. The peculiarity is that they first cut out and remove small fragments, and then cut out an outline from a piece of paper. With this sequence of actions, there is less chance of breaking thin jumpers, and it’s easier to work this way.

How to make an openwork butterfly from paper - the process in pictures
You need to work with a knife with a thin and sharp blade. It’s better not on the table, but by placing something quite hard - maybe a piece of plastic, etc. But you need to understand that grooves and cuts will remain on the surface, so it will be problematic to use this piece for any other purposes.
Multilayer volumetric
When making multilayer volumetric butterflies, several pieces of the same shape are cut out (size and color may vary). They are stacked one on top of the other, the “bodies” are glued together, and the wings are bent at different angles. This is how these butterflies turn out to be more voluminous.

You can make a combination of openwork and contour butterflies. Take paper of contrasting colors or find one color, but different shades. Make them into butterflies of the same shape. Only some will be with openwork, others - without. Arrange them by placing a fragment without a pattern underneath. This produces an interesting effect.

There is a technique that allows you to immediately cut out three-dimensional butterflies from paper. You will need two rectangles of paper - a larger one (for large wings) and a smaller one. We fold them diagonally once, then a second time. The result is two triangles of different sizes. Now we bend the paper inward from two opposite sides so that we get a triangle like in the third photo (with the newspaper).

Draw wings on the resulting triangles. In larger ones, the openwork can be located only along the edge, in smaller ones - over the entire area. We cut out the blanks and put them one inside the other and glue them together. On top we glue a separately cut out “body” with antennae. Due to the fact that the paper is folded and the wings are double, the products have a larger volume.
Corrugated paper
It is easier to work with corrugated paper and butterflies for decoration are more airy and light, since the paper is translucent. We select suitable colors, take threads, scissors, glue. Nothing more is required. We cut out rectangles of approximately 7*10 cm from paper.

We sew the resulting rectangles in the middle with a needle and thread, tighten them, and make a couple of turns with the thread. It turns out something resembling a bow. We fold it in half, straighten the paper with our fingers, trying to leave as few folds as possible - we form wings.

When the result satisfies you, take scissors and cut off a strip of a few millimeters from that edge - into antennae. On the rest of the part we form a patterned edge reminiscent of a butterfly wing.

We twist the antennae strips with our fingers into thin tubes. Now they definitely resemble antennae. We unfold the wings and finally straighten them. The result was light butterflies.
From folded paper
You can make paper butterflies for decoration from double-sided colored paper or old magazines by folding them into a small accordion. We cut out two squares or rhombuses from paper (one a little larger, the second a little smaller), fold them into a small “accordion”, starting from one of the corners. The smaller the fold, the more interesting the product will be.

We put two folded rhombuses next to each other, tie them in the middle with thread or flexible wire in a sheath suitable color. We make antennae from the remnants of the wire, straighten the wings, and adjust the shape if desired.
Photo for inspiration
First, a little about how and what you can attach already made paper butterflies to. The easiest way is to apply glue to walls or panels. The second, no less simple way is to use double-sided tape. But to make the decoration more voluminous, it is best to glue it not directly to the wall, but to a small piece of foam rubber. The result will be a more airy composition, with clear shadows.

Paper butterflies are used to create three-dimensional decorative compositions on small hoops with a fishing line tied to them. Cut out paper insects are attached to the fishing line. You can’t hang them on the wall, but they look very original, although creating such a composition is more difficult than on the wall.

Hoops and fishing line are all you need to create this beauty
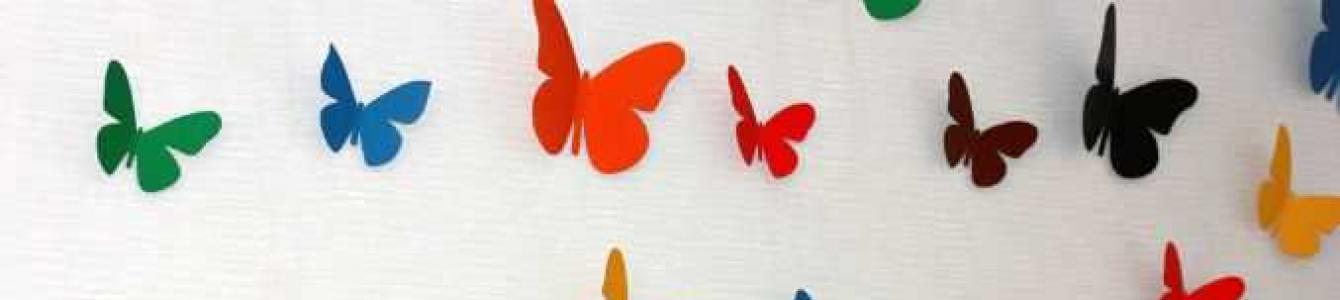
And several wall compositions in which butterflies are used for decoration, made from different types paper.


Another option with a large butterfly...

Colorful tornado...


The main thing is to find a bright picture and even a simple silhouette will look great
In decoration, paper butterflies are deservedly in high demand, as they allow you to get a decent solution for most situations in a short time and with minimal expenditure of money.
Of course, if you want to make the perfect decor option, you will have to choose the right paper and materials, you will need to work to ensure that the shape of the product is correct, without slanting and uneven lines and areas, but, in any case, it is much more affordable and simple An option that allows you to create interesting products with your own hands and not spend additional money on decoration.

Choosing the butterfly option
On the Internet, if you search, you can find photos of paper butterflies in such shapes and colors that your head will spin - on the Internet there are thousands of photographs of a wide variety of plans, in which you can look at what the butterfly looks like, what materials it was made from and why it was made this way and not otherwise.

That is, with the help of the Internet, you get a large catalog of options; all you have to do is choose for what purpose you want to collect this decorative product, what costs you expect and how much time you have to do it all productively.


For adults and children
For example, if you just decided to spend time with your child and want to load him with manual work, then you can choose simpler options. It is difficult for a child to understand the technical features of a butterfly, but if you give a simple version, he will develop creative thinking, the child will begin to better understand colors and shapes, begin to think logically, and so on.

Plus, if possible, it is better to choose a butterfly model that can be made without the use of scissors or cutting tools, there are also many such options, the connections are made using glue or thread, so there is no need to cut anything, which will protect your child from accidental damage with scissors or paper.

If you decide to make a butterfly for room decoration and you are no longer a child, but an adult, then you can look at more interesting options butterflies, pick up suitable materials and spend a certain amount of time creating a design element.

Fortunately, on the same Internet, there are options for the most complex butterflies for decoration - you can decorate walls, furniture elements, paintings, ceilings, chandeliers and other lighting fixtures, you can even make a lampshade for a floor lamp or pendant lamp with a certain choice of materials, you have a lot of choice and very decent, you just have to decide what exactly you want to do and for what purposes.


Quilling - for strong nerves and dexterous hands
A very interesting technique for creating paper butterflies is quilling. If you don’t know how to make a paper butterfly as beautiful as possible, then look at this option. In the case of quilling, a butterfly is created from several strips of colored paper, and it is colored on both sides. You need to cut the paper into even lines of the same width, then fold them into rings of different diameters and make even, identical wings for the butterfly from them.

Naturally, this process requires a certain skill - cutting paper into even strips is quite problematic, plus molding them is very problematic; you need to carefully glue each strip and align it so that nothing sticks out and visually the wings appear the same. It's really difficult, but there are certain tricks.

You can find a paper butterfly template online and cut all the parts according to this pattern, and then practice gluing the parts. As practice has shown, literally from the third or fifth butterfly you can cut the parts more or less evenly, plus learn how to glue the parts correctly, without bent paper or other defects.

After a lot of work and selection of suitable color options, you will get a fairly attractive butterfly that will fit perfectly into the interior of most rooms.

Types of butterflies
There are other options for butterflies - openwork, when something like a snowflake is cut out of paper, only the shape is different, there are garlands of paper butterflies, there is even a special origami technique so that you can practice creating paper products yourself different shapes and size.

For maximum efficient work with paper it’s worth trying all the options - certain styles, like openwork butterflies, are great for learning how to work with scissors and cut out small details with a blade, but this is a task for an adult, of course, and if you want to keep your child busy with an interesting activity, then look at origami - very interesting, does not require the use of additional tools and for a certain age it will be an ideal activity - educational, interesting and does not require large expenses, which is also very, very pleasant.


Useful properties of working with paper
It has long been known that paper origami can improve fine motor skills of the hands, improve visual images, creative thinking and memory, plus it is an excellent relaxing activity for the brain - you move away from the outside world and do only handicrafts, this is a big advantage.

Other options for working with paper involve cutting paper and gluing, so this is a task for the older generation, which is definitely worth taking into account - origami is interesting for children, but cutting paper with scissors is dangerous and not entirely reasonable. Good luck in your endeavors!

Photo of paper butterflies


There is, perhaps, nothing more ordinary and at the same time original than a decoration in the form of a butterfly. This form is good in everything. Jewelry, clothing items and accessories are created in the shape of butterflies. Butterflies decorate postcards, notebooks, photo albums, furniture and even just walls. Finished products can be purchased in a store and simply stuck to the desired place, or you can make them yourself, which is undoubtedly a more exciting activity.
What can you make a butterfly from?
Not only a paper butterfly can serve as decoration. To create this charming decorative element, you can use fabric, threads, ribbons, beads, natural material and even used plastic bottles. In any case, thanks to patience and indefatigable imagination, you will be able to create miniature masterpieces with your own hands.
It's so exciting! Take a piece of unwanted garbage and turn it into a beautiful butterfly. This kind of handicraft is very inspiring. Just get creative and use everything you don’t need at home. Turn it all into your own little masterpiece. Let's look at several ways to make a paper butterfly.
Butterflies using quilling technique
The simplest, but no less beautiful decorative option is a paper butterfly. You can make it with your own hands in several ways. And get a unique option every time. More complex options are a paper butterfly made from double-sided strips. This technique is called quilling and requires certain skills, tools and a lot of time. But the products turn out amazing. Having made these kinds of insects of different sizes, you can hang them from the ceiling or chandelier using a very thin fishing line at different levels, which will create a wonderful weightless effect. They can be used to decorate curtains and walls, cards and albums, and even as jewelry.

Openwork butterflies
Another option is a DIY paper butterfly using the weaving technique. This technique is one of the types of folk decorative art. Its essence consists of cutting out paper using scissors or special knives. Works in this style can be simpler, or can reach the heights of grace.

Most often they decorate windows or mirrors and other glass surfaces. They are attached using soap solution. They are also used in creating postcards. To make such a decoration, they use paper butterfly templates, which they use to cut out their products.
Figured butterflies can also be cut out using a plotter. This is such a special tool. Then you, of course, will spend much less effort and time creating them if you need a large number of decorating elements.
Simple garland of paper butterflies
Making a garland, the main element of which is a paper butterfly, is not difficult at all with your own hands.

Moreover, you will probably find everything you need at home. And everything you need to brighten up a dull room or decorate fun party, these are several sheets of multi-colored double-sided paper and decorative or regular wire. A ribbon or rope on which the garland will be attached will also come in handy.
For one butterfly you will need 2 squares measuring 15 x 15 cm. Fold each of them diagonally. You should get a triangle. Now fold both triangles towards each other, that is, from the edge to the center, like an accordion. The width of the fold should be no more than a centimeter. Do the same with the second square. Then connect them together in the center and wrap them with wire, bending the edges in the form of antennae. That's all. Our paper butterfly is ready. Make as many of these as you need. Now all that remains is to attach them to the tape and hang them where you want them to be.
Butterfly using origami technique
Let's look at another way to make a paper butterfly. It cannot be called simple or complex. Rather, both options are present here. Everything will depend on the paper butterfly pattern used. And believe me, they exist great amount. And all of different levels of difficulty. And, of course, the more complex and intricate the scheme, the more interesting it looks in the end

When folding your product, make sure each time that all folds are made perfectly and do not warp. If you choose a material with an interesting color or unusual texture, your origami paper butterfly will not disappoint you.
Place the square of paper with the white side facing up. Fold it twice diagonally and once vertically. Next, follow exactly the instructions shown in the picture above.
By making a large number of these butterflies, you can miraculously decorate any room with their help. You can make them in different sizes and use all the rainbow colors. After this, glue it to the original non-bulky driftwood, imitating color scheme rainbows. And nail a driftwood with butterflies to the wall, for example, in a children's room.
Butterflies on the wall made of paper and more
There are many ways to “settle” such wonderful insects as butterflies on your wall. One of them is a three-dimensional transparent painting, inside of which there is a dried butterfly of a rare species. It looks amazing, but not for those who are for the preservation of wildlife. This exhibition is unlikely to please such people.
Another, no less beautiful option would be butterflies made from feathers and wire. They often have variegated colors and look great on plain walls. If you have walls with a pattern, then this option is unlikely to suit you, since such butterflies will get lost against this background.
Or you can buy butterflies made from self-adhesive film and stick them wherever you want.
What you can do with your own hands
You can create butterflies with your own hands not only from paper, but also from cardboard, thin plastic and even from oracle.

Butterflies made from vinyl records. To make them, you need to trace the butterfly template on the plate using white pencil and heat it in the oven, holding the plate there for no more than 45 seconds. Once the vinyl is soft, cut out the butterfly and shape it. It is possible that the heating procedure for each butterfly will need to be repeated several times. After all, this material cools and hardens just as quickly as it heats up.
Perhaps the easiest option for decorating walls would be paper butterflies. The photo shows how unusual compositions can be obtained from them.
Composition mounting options
Decorative insects made or purchased by you can be fixed to a permanent location different ways. There are four mounting options in total.
- Fastening with glue. The choice of adhesive material will depend both on what you are going to attach your element of the composition to, and on the material from which the attached object is made. If we are dealing with paper insects, then most often the number one choice is PVA glue. And the main thing here is not to get carried away. If you apply more than necessary, you risk not only smearing, but also distorting the color.
- You can use the pin method. It is, of course, much neater than the adhesive one, but it will only work if there is space between the wall and the wallpaper.
- Another mounting option is fixation with tape. You can use both flat and volumetric versions. The latter will add airiness and weightlessness to your composition.
- And last but not least, and perhaps even more original way- using threads and transparent wire. This type of fastening is especially suitable for butterflies that have been folded using the origami technique. This type of fixation will touch your imagination to the maximum and bring a lot of positive emotions in progress.
Preparing to create paper decor
Although paper insects are the cheapest option for decoration, this method still gives you options that no other can give you. When creating paper butterflies, you can make them flat or voluminous, smooth or textured, multi-layered and even openwork. Or even combine everything in one. The main thing is to approach this issue not only creatively, but also wisely. After all, your composition should improve the room as much as possible. Breathe life and dynamics into it, and not become an indicator of bad taste. It should also be noted that the paper color range is not only very wide, but can easily be supplemented with all kinds of paints. Although in fairness it should be noted that most a win-win- these are black monochromatic butterflies. In general, before you get down to work, think through everything down to the smallest detail. Starting from shape and color and ending with methods of attaching the composition.
The process of creating a butterfly for a wall composition
In order to make a paper butterfly, which will become one of the elements of the future wall composition, you will need the following materials and tools.

Firstly, this is paper and small decorative elements for decoration, if you want to use them. For example, it could be rhinestones. Secondly, scissors, glue, pencil and everything you need for fastening. Also use ready-made templates to use to cut out insects for your composition.
So, let's look at how to make a paper butterfly. Cut the paper you will use into squares. The sizes of the figures depend on your idea. Fold each square in half and carefully trace half of the sketch of your future butterfly on one side, working out all the details. Without unfolding the square, carefully cut out all the elements, and only then unfold it. You will get a completely symmetrical insect.
Once all the butterflies are cut out, decorate them as you intended and begin attaching them to the wall. On the surface that will be the basis of the composition, apply markings in advance so that you don’t end up with any unpleasant surprises.
It is not for nothing that handicrafts are highly valued, especially if they can be used in everyday life. Sometimes the ability to craft from paper really helps when you need to make original postcard, decorate the interior of a room, give a gift, decorate a stage for a performance, etc. In our article we will talk about several ways to make a butterfly out of paper. Spending time doing this activity instills a sense of aesthetics while simultaneously developing your brain's fine motor skills.
Content:
Paper butterfly - origami
Crafts made using the origami technique always look advantageous, and, importantly, they are usually made without glue or tape. Origami paper butterflies fit beautifully into bouquets of flowers and gift packaging, interior of rooms.
Making a butterfly is not difficult if you have 20 minutes of free time, a double-sided sheet of paper of any color, preferably square and its size from 7 to 9 cm.

Using the diagram and the following tips, you can easily implement your plans:
- Take the paper and fold it in half, first lengthwise, unfold it, then crosswise and unfold it again.
- Make lines connecting diagonally opposite corners and unfold again.
- Make a triangular shape out of the sheet by inserting a border inside on the right and left sides, following the fold lines made in the previous paragraphs.
- Find the bottom corners in the workpiece. They will need to be folded upward to create inclined folds.
- Straighten the figure and bend the top. The highest point of the bent corner should protrude slightly beyond the outer outlines of the workpiece. Now the future butterfly needs to be fixed in this position.
- Fold the workpiece in half crosswise. End of work.
Advice! Do not press the paper too hard when folding. Otherwise, the butterfly will not turn out with beautiful volume.
Paper butterflies on the wall

The decor with the help of butterflies turns out to be cheerful, lively, creating a joyful mood. To make colorful insects we may need different material. For example, you can decorate a wall with a butterfly made from a colored magazine.

Do the following:
- Take a sheet from a magazine and fold it in half.
- Draw a triangle so that one of its sides falls on the fold line.
- Cut and unfold. You should have a diamond shape.
- From the same sheet (if there is enough space) cut out a second diamond, only slightly larger than the previous one.
- Make an accordion out of the two resulting figures (start from the center), and then apply a little glue to fix it.
- Connect the two diamonds with glue as well.
- Pull the accordion a little with your fingers so that the wings are slightly straightened.
- Make antennae from thin wire or a strip of paper, wrap them at the ends and attach them to the center.
- End of work. The butterfly is ready.

In the same way, you can make moths from colored paper, which can delight the baby’s eyes in a crib, or be a decoration for any postcard or even a holiday table.

Corrugated paper butterflies
The advantages of corrugated paper were appreciated in the USSR. Now its popularity is still high, since crafts made from it are durable, beautiful, and convenient to work with.
Butterflies from corrugated paper are made very quickly. To do this, prepare:
- different colors of corrugated paper;
- thread with needle;
- glue;
- scissors;
- ruler;
- simple pencil.

Step-by-step algorithm for making butterflies:

Beautiful paper butterflies
No matter what the butterfly is made of, it will still be beautiful. Paper butterflies look more natural, because the lightness inherent in these flying representatives of the fauna is respected. Therefore, needlewomen know several options for creating such unusual decorative items.
Colored crafts
In order to make a regular butterfly, one side of which you will glue to the surface, you just need to take a one-sided colored paper, fold the sheet in half, draw the contours of one side of the butterfly so that the fold line falls in the middle of the future craft, cut and unfold. You can draw completely different butterflies, with different shapes of wings, sizes, etc.

Butterflies made from a newspaper or magazine look very beautiful and stylish. They can even be opened with clear varnish.

Colored cardboard also looks great for this type of craft. The image is very clear and more or less solid.

Openwork butterflies
To create openwork butterflies, cardboard or thick paper is usually used. It is folded in half and the body (thickened) and wings are drawn. A certain design is made on the wings, which is then cut out. Cardboard can be of different colors.


It is necessary to take into account that when cutting, you should take a sharp knife, and also know that unnecessary pieces in the pattern on the wings are first removed, and only then the entire outline is cut out.

Multilayer volumetric
To create a three-dimensional insect, take any material: colored paper, cardboard, newspapers, magazines, music notebook, etc., draw and cut out several contours of a butterfly of different sizes. And then glue them together and raise the wings as you like.

Multilayer butterflies made of openwork material and plain paper look very interesting.

A beautiful butterfly is obtained in the following way:
- Take any paper and cut out 2 rectangles from it. One should be larger, the other smaller. This is done in order to make wings for our butterfly.
- Fold their corners, located diagonally on one side and the other.
- Fold the sheet inward along the intended diagonals 2 times. A triangle should come out, one larger, the other smaller.
- Fold the material inside on the left and right. Refer to photo 3.
- With a simple pencil on these geometric shapes draw the wings the way you want.
- Since the large wings will be on the bottom, the pattern should be located along the edges, and on the small ones you can make squiggles over the entire surface.
- Cut out the outline, place one wing into the other and secure with glue.
- Draw and cut out the butterfly's body and antennae. Glue it all in the middle.
- Slightly straighten and lift the upper wings. The result was a voluminous openwork butterfly.


Video instructions
Our videos will help you quickly navigate and make any paper butterfly.
Origami butterfly:
Corrugated butterflies:
Openwork butterflies:
Making paper butterflies with your own hands
A paper butterfly can become a decoration for walls or clothing; it is also suitable as a gift. These crafts are always in fashion and relevant for the holidays. Making a paper butterfly with your own hands is easy. It is enough to arm yourself with the necessary tools and materials, learn a few secrets and use your own imagination.
Butterfly stencils for cutting
Openwork paper butterflies especially attract attention. They are beautiful and unusual, so they are perfect for decorating a room. To make such a product you will need a stencil. It's easy to do it yourself. To do this, a silhouette is drawn on the cardboard, and in the middle a drawing is created at your own discretion. First, the butterfly itself is cut out along the contour, and then the pattern inside. This way, you get a stencil that can be used repeatedly. All you have to do is attach it to paper of any color, trace it and cut it out.
On a note! When making a stencil, we cut it out carefully, otherwise all the imperfections will constantly be reflected in the finished products. It is convenient to use a small sharp knife for this. To add volume, you don’t have to strictly adhere to symmetry. You can make the wings a little different, but so that it is not too noticeable.
Today on the Internet there are ready-made sketches of butterflies for cutting. First, you will have to download and print them, and then transfer them to cardboard, as in the previous case.


Another option is to purchase ready-made stencils.

On a note! Openwork craft It will look more interesting if you cover it with glitter varnish.
Paper butterfly templates
Essentially, a template is the same stencil. But sometimes an ordinary sketch, without an internal pattern, is mistaken for it. Templates are used similarly to stencils. They can be created manually using your imagination.


There are ready-made templates on the Internet that will eliminate the need to show your artistic abilities.

Cut out the butterfly along the outline of the template
First, you need to attach them to the paper to make the product, trace the outline, and then cut out along it. This way you can make products of completely different sizes. It is recommended to involve children in the process; they will find this activity interesting.
On a note! With the help of such products you can design a layout, decorate a wall, curtains, strew the floor with them, or fill a vase. It will not be difficult for a person with unlimited imagination to find a use for them.
How to make a butterfly using the origami method
Multilayer volumetric craft obtained using the origami method.
The product will be completed step by step as follows:
The paper square is folded in half (horizontally and vertically), and then diagonally on both sides.
The workpiece is folded into a triangle.
The upper part of the triangle bends towards the crown.
The workpiece is turned over so that the top of the triangle faces down. Then it bends so that it goes beyond the base.
The result will be a small end of the triangle that will stick out slightly. It is necessary to bend it and fix it with glue on the back side.
The product is almost ready, it remains to be slightly modified to obtain the desired shape. To do this, the craft is bent in half on the side where the small triangle is located. Antennae can be made from wire.
It may not be possible to immediately understand the entire principle of action. For clarity, a photo of step-by-step execution is presented.

The picture below shows how original the decoration turned out.
Using the origami method, you can make an accordion craft. For this you will need:
- ultra-fine brush;
- thread (depending on the idea);
The following sequence of actions is performed:
A square piece of paper is folded in half, resulting in a triangle.
From the middle of the figure you need to start creating an accordion by bending the material. Similar actions are repeated with another paper square.
The resulting accordions are folded and wrapped in the center with a ruff. It is necessary that it not only serve as a fastening element, but also be used as antennae.
The “wings” are slightly unfolded to make them larger in size.
The pictures below will help you visualize the process of making such “accordions”.

From many such elements one can make a beautiful garland. To do this, they are connected by a thread that runs through the center of each craft.
Video: how to cut a butterfly from paper
Below is a short video showing how to cut a paper butterfly.
And another video of making unusual crafts for wall decoration
Sometimes you can make unusual and beautiful things out of paper. To do this, the Internet is filled with master classes, video instructions and other material that will help in this craft. For those who do not want to start from the basics, ready-made templates are offered that significantly simplify the task. With their help you can create shapes of flowers, turtles, cats and much more. In the future, the products can be designed at your own discretion. Some use varnish for this, others use paint, and others cover it with fabric. In this case, there is room for your imagination to run wild. A paper butterfly is more simple crafts, which require a minimum of experience and time to complete.
Elena Kandakova
Dear friends and guests of my page, I suggest volumetric butterfly master class, which the children and I did for group work. I will write about this lesson in the next publication. Now watch and try with us.
So, to work we will be needed:
colored paper in different colors,
simple pencil,
sample butterflies.
1. For the main template, take the cut out butterfly from a piece of old wallpaper.

2. Fold the template in half and trace it onto a white sheet paper. To us for butterflies You need to prepare three templates of different sizes. Use dotted lines to draw the outline of the smaller template, 0.5 cm from the edge.

3. This is what we should get. Three templates for butterflies.

4. Templates in expanded form.


How to make a flying butterfly out of paper?
A flying butterfly looks very interesting and harmonious. The main task is to produce an elegant insect that will be as close to the real thing as possible. After hanging it vertically on a thread, it should look like the insect is flying.
You can see how to make a flying butterfly in the video.
VIDEO: Flying paper butterfly
Basically, such applications are used to create paintings. Also, a paper butterfly will be an excellent option for development fine motor skills hands of preschool children. Depending on the age of the baby, the complexity of the application is selected. For children nursery group It's better to cut out the templates yourself. Kids only have to glue the parts. Below are several options for applications for children. of different ages. Usually look nice voluminous applications made using lace technique. Such techniques should be performed by children from 4 years of age.


VIDEO: Paper butterfly applique
Butterflies are called winged flowers; they can add airiness and a certain frivolity to the room. Making panels from paper butterflies is very simple. The simplest option is a picture with glued paper butterflies.
Materials:
- Scissors
- Basis for panels
- Paper of the required color
Instructions:
- Decide on the size of the panel and the drawing itself. Also find out what kind of drawing you will create.
- After choosing a stencil, cut out butterflies from colored paper and glue them to the base canvas
- It is advisable to mark in advance with a pencil the line along which you should glue the butterflies


Such decorative elements are made of paper and can either be glued or hang over the wall. Such butterflies can be mounted on furniture, a wall, or hung on threads.
Butterfly decor options:
- Butterflies fluttering under the ceiling
- Butterflies on the wall or furniture
- Decoration of chandeliers and lamps with butterflies


Silhouettes on the wall can be either voluminous or flat. Initially, a base silhouette is selected. Most often, butterflies resemble a flock; sometimes small butterflies form a huge moth. It could be a cup with butterflies flying out or a watch. In this case, butterflies symbolize the transience of time. A whirlwind of butterflies also looks harmonious and interesting.


Butterflies made of colored paper will be an excellent addition to the interior. They are made using origami or quilling techniques. These are insects made by folding and gluing pieces of paper. It turns out openwork butterflies. It looks very beautiful, especially if you combine colored paper. Below are templates and photos of butterflies made from colored paper.


This kind of figurines are used to decorate a child's room. They look very gentle and unusual. Such butterflies are hung on threads and used to decorate play areas. Such butterflies combine very nicely with bright and colored lighting. This can be side lighting or direct rays.


Large butterflies are used for wedding or holiday decorations. Despite its cheapness and simplicity, such decor can significantly improve a room and make it festive. Usually thick paper is used that holds its shape well. This prevents the wings from bending. Such butterflies are suspended on ropes, fishing lines or threads.


If you do not have such experience, then it is better to carry out such decoration on painted walls or non-woven wallpaper. In this case, if you don’t really like the result, you can remove the butterflies. It is best to attach the butterflies not with glue, but with double-sided tape. It comes off perfectly from wallpaper and painted walls. You should not use it in case of paper wallpaper.


Decorating a room with paper butterflies is quite simple. You need to stock up on patience and materials.
What to do if you are tired of decorating a room, but there is no money or energy for repairs? The fastest and least expensive way is to change textiles and decorative elements. Moreover, not all decor needs to be purchased. For example, decorative butterflies will help add an element of lightness. They are used to make panels and wall compositions. Larger and brighter ones “live” on curtains or flowers.
What are they made from?


Another option with a large butterfly...

Colorful tornado...


